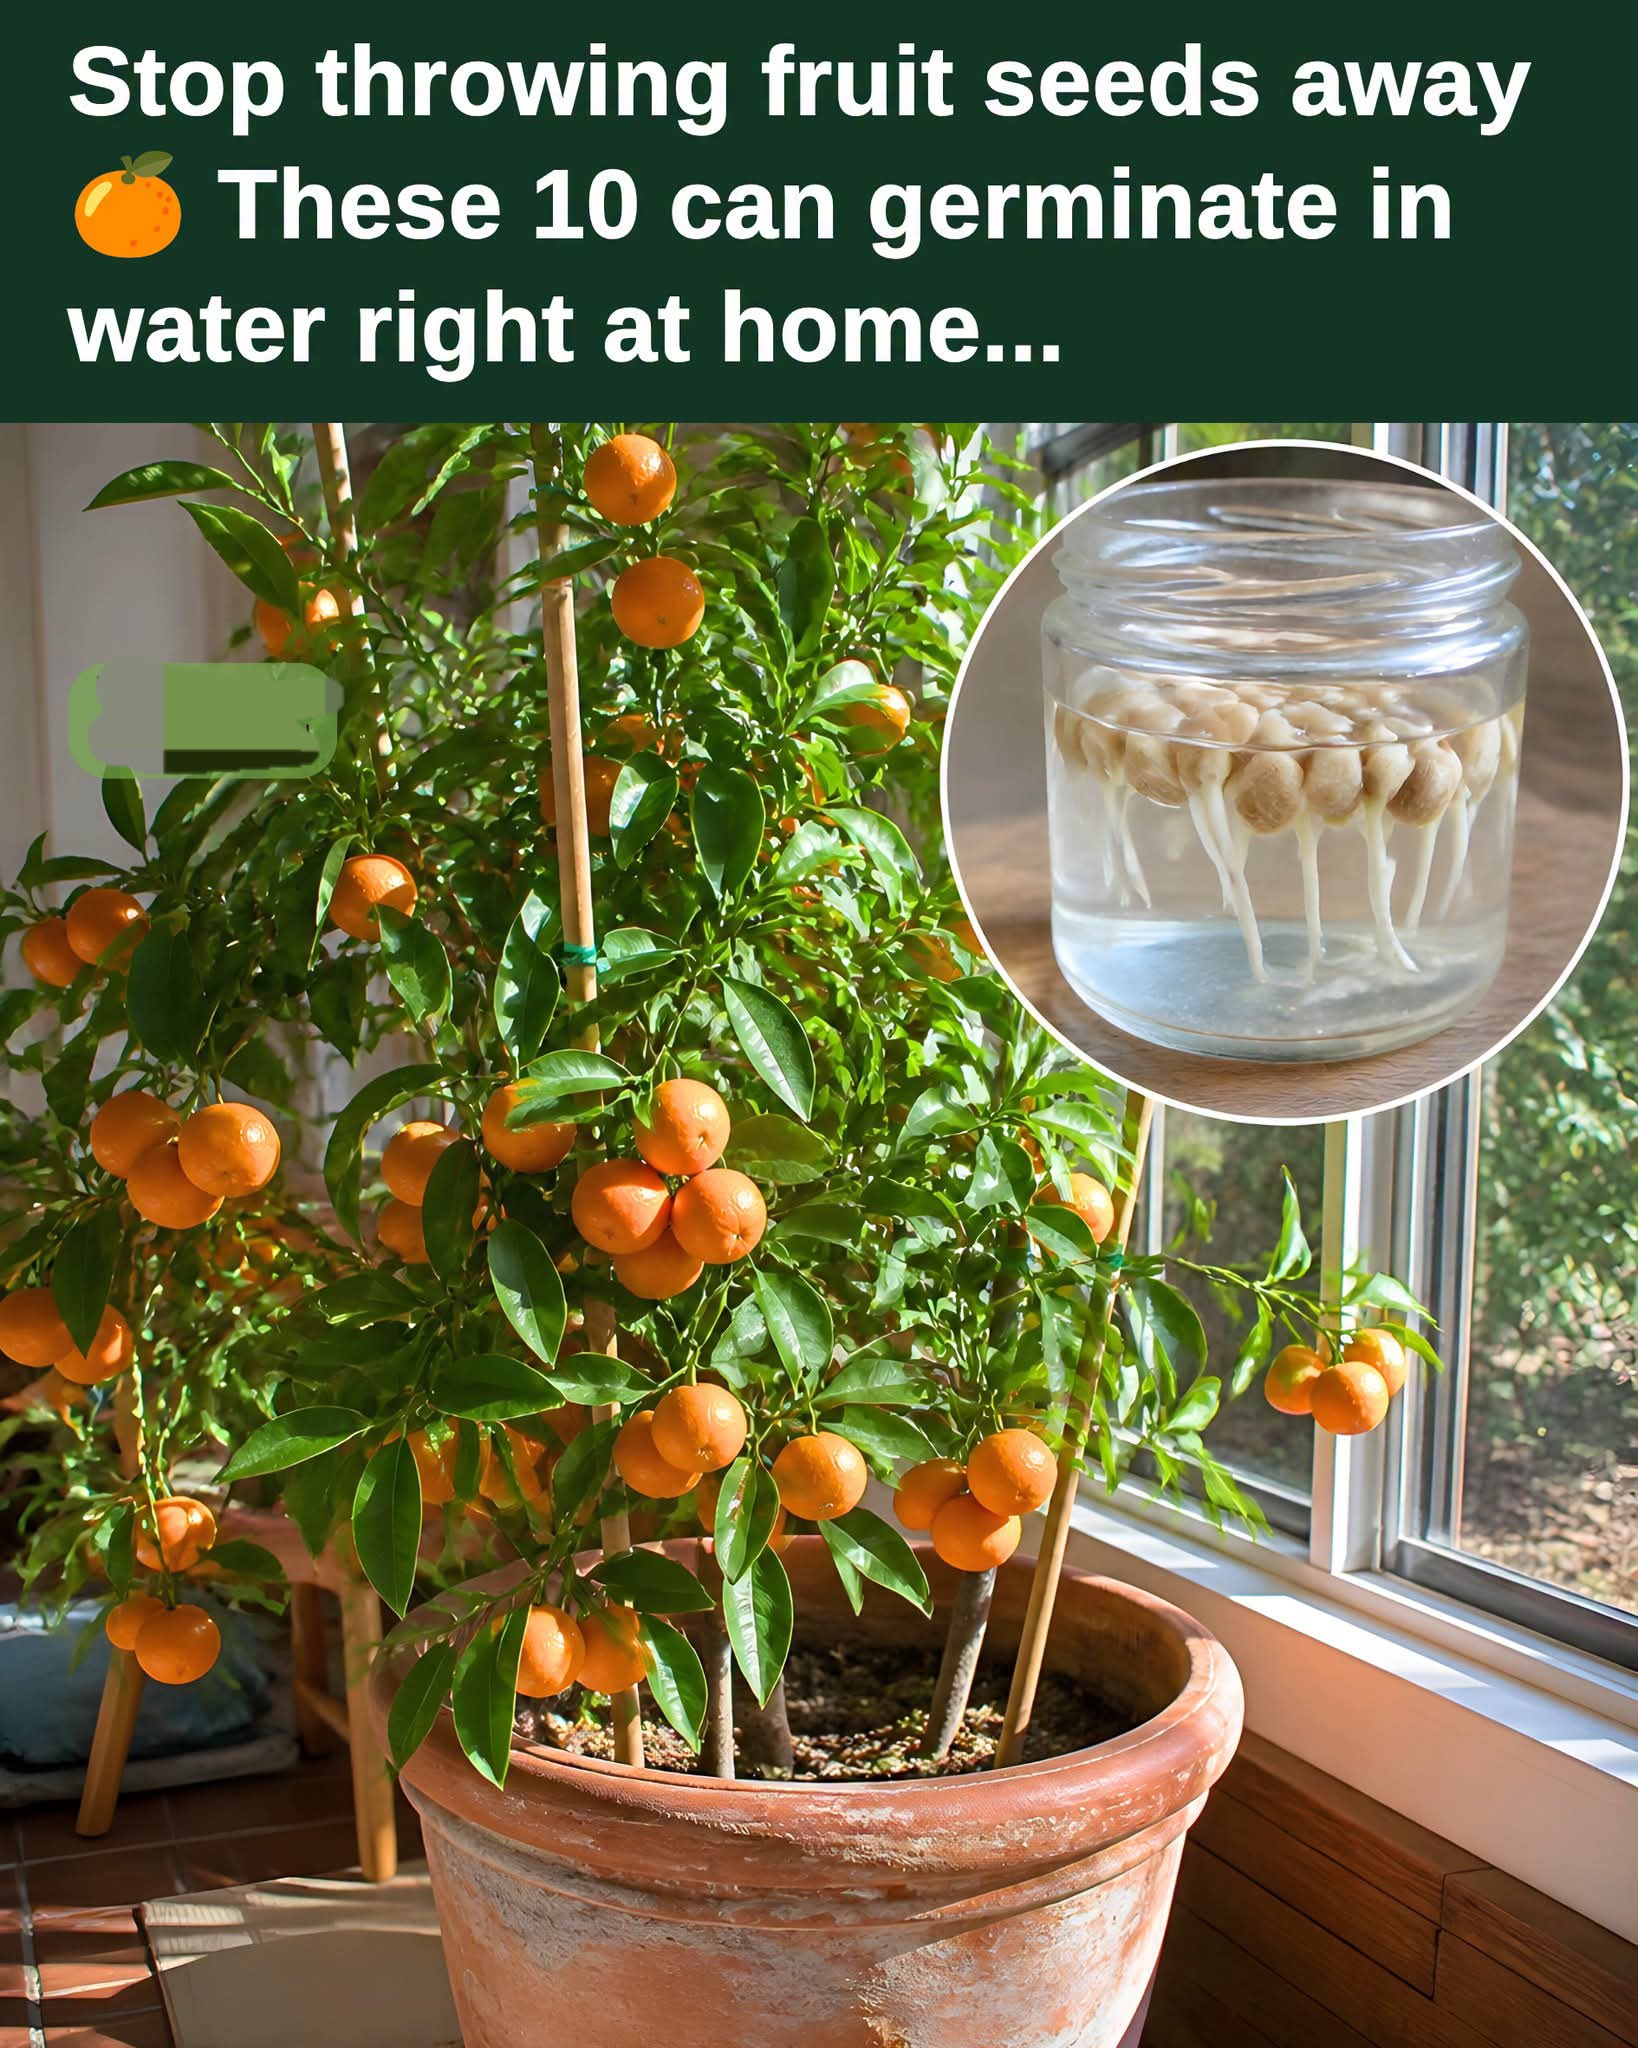
Everyone (myself included) wants a lush indoor jungle until we see the nursery price tags. My solution involves leftovers, sticky counters, filtered water, and recycled jam jars. Even if you lack a green thumb, you have other fingers perfectly capable of cleaning a fruit seed.
Quick note: not every fruit you buy will give you viable seeds, and even when they do, what grows might not look anything like the original.
Liquid Assets or What Kind of Water Works?
Tired of seeds that require filtered tears to sprout? Simply skip heavily chlorinated tap water for some filtered, bottled, or rainwater instead and you’re golden. And change it frequently. Fresh water helps prevent rot and keeps oxygen available for developing roots.
The USDA zones mentioned below reflect where these plants can grow outdoors, but if you’re outside those zones, you can still grow many of them in pots and bring them indoors.
🌱 10 Easy Fruit Seeds You Can Germinate in Water at Home
Have you ever eaten a delicious piece of fruit and thought, “I wonder if I could actually grow this?” 🍋🥭🥑
You absolutely can try!
Your kitchen produces plenty of seeds that can become the beginning of a little home-growing experiment. Some fruit seeds sprout surprisingly quickly when given moisture, warmth, and light. Others take patience, and certain seeds need a period of cold before they will germinate.
One important point: germinating a seed in water doesn’t mean the plant should live in water. Water is simply a convenient way to encourage roots to appear. Once roots develop, most seedlings should be transferred to soil.
Here are 10 fruit seeds that are fun to try at home.
🥑 1. Avocado
The avocado pit is probably one of the most recognizable seeds to sprout in water.
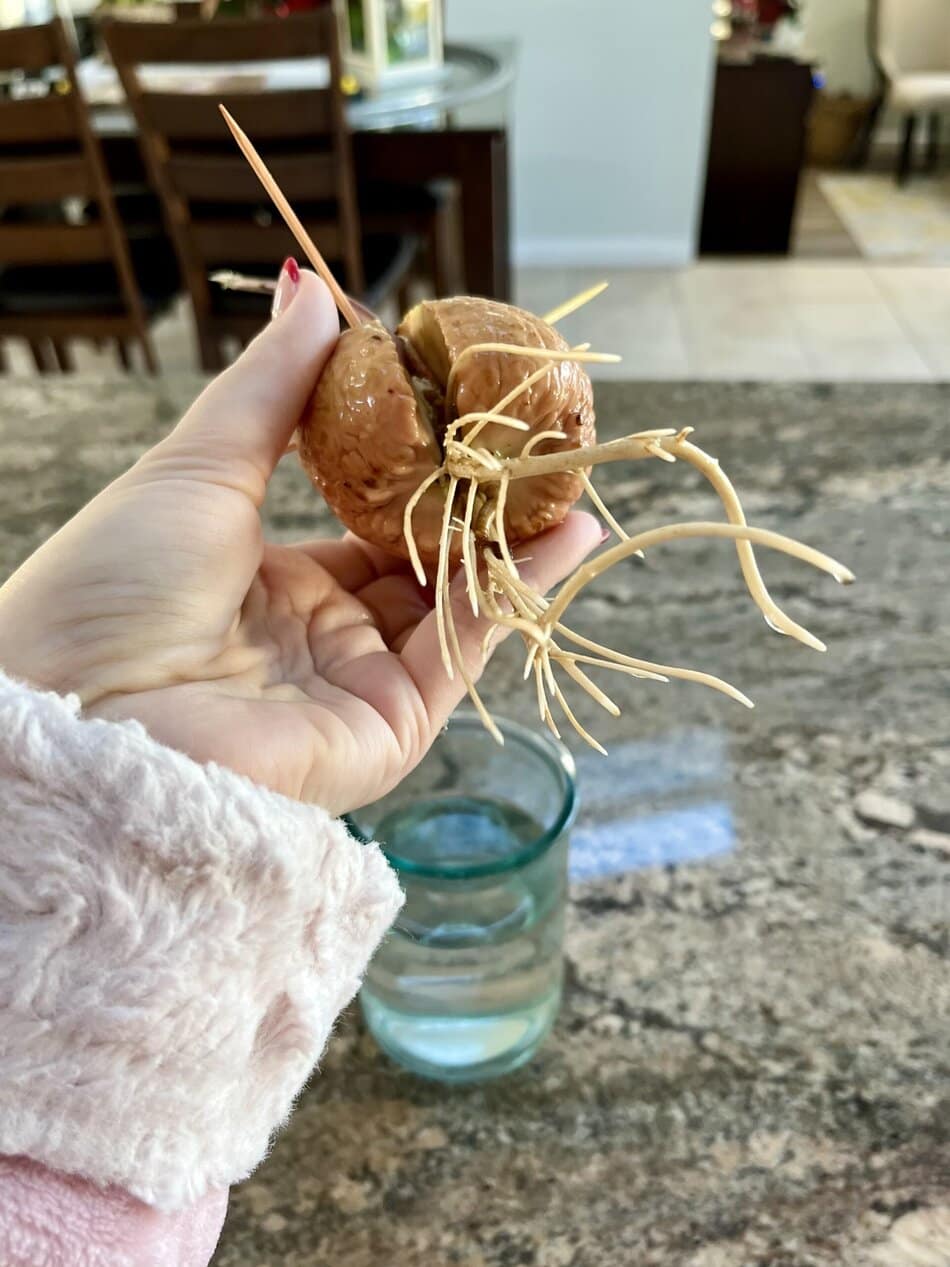
After removing the pit, wash off the fruit and gently insert three or four toothpicks around its sides. Suspend the pit over a glass so the bottom portion sits in water.
Place it somewhere warm with bright, indirect light and keep the water fresh.
After several weeks, the pit may split and a root can emerge from the bottom. A stem will eventually grow from the top.
Once the seedling has a healthy root system and several inches of growth, it can be planted in potting soil.
Fun fact: Growing an avocado plant from a pit is a wonderful gardening project, but don’t expect a supermarket avocado tree to produce identical fruit—or necessarily fruit at all when grown indoors. Commercial avocado varieties are commonly grafted.
🥭 2. Mango
Mango seeds can also be started at home.
The tricky part is getting past the hard outer husk surrounding the actual seed.
Carefully clean the mango seed and remove the hard husk to expose the inner seed. Don’t cut into the seed itself.
Place the seed in a shallow container with water, keeping part of it above the surface. Change the water regularly.
With warmth and patience, you may see a root begin developing, followed by a shoot.
Once the root and shoot are established, transfer the young mango plant into well-draining potting soil.
Mango seedlings love warmth and plenty of sunlight once they’re established.
🍋 3. Lemon
Lemon seeds are easy and fun to experiment with.
Choose fresh seeds from a ripe lemon and rinse away the sticky fruit pulp.
Place the seeds in water for a short period to keep them hydrated, then transfer them to a moist growing medium—or you can use water initially to watch for the first root.
Don’t allow the seeds to dry out before planting.
Once a root appears, plant the seed shallowly in moist potting soil and place it somewhere warm and bright.
With good conditions, lemon seedlings can develop into attractive little citrus plants.
Just remember: a lemon tree grown from seed can take years to mature and may not produce fruit indoors.
🍊 4. Orange
Orange seeds can be started in much the same way as lemon seeds.
Remove the seeds from a fresh orange and rinse them thoroughly.
Fresh citrus seeds generally germinate best when they’re planted soon after removing them from the fruit rather than being allowed to dry out completely.
You can begin the process in water, then transfer the seed once the root appears.
Plant the sprouted seed in moist, well-draining potting mix and keep it warm.
Soon you may have your own tiny citrus seedling growing on a windowsill.
🍊 5. Grapefruit
Grapefruit seeds are another fun citrus experiment.
Save several seeds from a fresh grapefruit, rinse them clean, and keep them moist.
You can place them in water initially to encourage hydration and watch for the beginning of root development.
Once you see a healthy root, move the seed into soil.
Because not every seed will successfully germinate, starting several at once gives you better odds.
🍈 6. Lime
Don’t throw away those lime seeds!
Fresh lime seeds can be rinsed and started while they’re still moist.
Place them in water briefly or use a moist growing medium to encourage germination.
Once a root develops, plant the seed in a small container filled with well-draining potting soil.
Keep the soil lightly moist rather than constantly wet.
Give the young lime plant plenty of warmth and sunlight.
🍎 7. Apple
Apple seeds are a little different.
They can germinate, but they’re generally not as quick or easy as avocado or citrus seeds.
Apple seeds often benefit from a period of cold, moist conditions—called cold stratification—before they germinate.
If you want to experiment, remove the seeds from a fresh apple and clean them thoroughly.
Instead of keeping them submerged in water for a long time, keep them moist and provide the appropriate cold period before planting.
Once they begin to germinate, transfer them into soil.
And there’s another fun surprise:
The apple you grow may not produce the same kind of apple you ate.
Apple varieties are usually propagated by grafting because seedlings are genetically different from their parent fruit.
🍐 8. Pear
Pear seeds are another great gardening experiment.
Like apples, pear seeds generally benefit from cold stratification before germination.
Keep the seeds moist during the cold period rather than leaving them sitting in stagnant water.
After the seed begins to sprout, plant it in moist, well-draining soil.
Give it plenty of light and continue caring for it as a young tree.
Growing a pear tree from seed requires patience, but it’s a fun way to turn kitchen scraps into a long-term gardening project.
🍑 9. Peach
Peaches contain a large stone surrounding the actual seed.
You can save the pit, clean it thoroughly, and attempt to germinate it.
However, peach seeds generally need cold, moist stratification before they will germinate reliably.
This means peach pits aren’t really a simple “drop it in a glass of water and watch it sprout” project.
After the required cold period, a root may emerge. Once the seed begins actively growing, plant it in soil.
If you’re trying this with children, it’s a particularly fun project because the seed can eventually become a small tree.
🟣 10. Plum
Plum pits can also be grown into trees, but like peaches, they usually require a period of cold stratification.
Clean the pit carefully and remove as much fruit residue as possible.
Keep it moist during the cold period, then plant it once the seed begins to germinate.
Once planted, provide warmth, moisture, and plenty of sunlight.
Growing a plum tree from a pit takes considerably more patience than sprouting a citrus seed, but seeing that first root emerge makes the experiment worthwhile.
💧 How to Germinate Fruit Seeds in Water
If you want to try the water method, keep it simple.
Step 1: Clean the seed
Remove as much fruit pulp as possible.
Fruit residue can encourage mold and bacterial growth.
Step 2: Use clean water
Place the seed in a clean glass or container.
Don’t completely submerge seeds that need access to air. For many seeds, it’s better to keep only part of the seed in contact with water.
Step 3: Change the water
Replace the water regularly so it doesn’t become stagnant.
If the water becomes cloudy or develops an unpleasant smell, change it immediately and inspect the seed for rot.
Step 4: Give it warmth
Most seeds germinate better in a warm environment.
A bright location is helpful, but avoid intense hot sunlight through glass while the seed is sitting in water.
Step 5: Watch for roots
The exciting moment is when that tiny white root appears!
Once the root is established, it’s usually time to transition the seedling into soil rather than keeping it permanently submerged.
🌱 The Paper Towel Method Is Often Even Easier
You don’t actually need a glass of water for every seed.
Another simple method is the moist paper towel method.
- Dampen a paper towel.
- Place the cleaned seeds inside.
- Fold the towel around them.
- Put it inside a loosely sealed plastic bag or container.
- Keep it somewhere warm.
- Check regularly for roots.
- Plant the seeds once they sprout.
The towel should be moist, not dripping wet.
This method provides moisture while still allowing the seed access to oxygen.
⚠️ Don’t Keep Sprouted Seeds Underwater Forever
This is one of the biggest mistakes beginners make.
A seed needs water to begin germinating, but the developing roots also need oxygen.
Once roots and shoots begin developing, keeping the entire seedling submerged can lead to rotting or poor growth.
Think of water as the starting point—not necessarily the permanent home.
☀️ What Happens After the Seed Sprouts?
Once the seed has developed a healthy root, carefully transfer it to a small pot containing quality, well-draining potting mix.
Plant according to the seed type and avoid burying the new shoot too deeply.
Keep the soil lightly moist while the seedling establishes itself.
As it grows, gradually provide the amount of sunlight appropriate for that particular fruit tree.
A small pot is usually better than putting a tiny seedling straight into a huge container.
🍎 Will a Fruit Tree Grown From Seed Produce Fruit?
Eventually, possibly—but there’s no guarantee.
This is especially important with apples, pears, peaches, plums, and many other fruit trees.
A seed contains genetic material from the parent plant, but it isn’t necessarily an exact genetic copy of the fruit you ate.
The resulting tree can produce fruit that is different in size, flavor, color, or other characteristics.
Some fruit trees also take several years before they reach fruit-bearing maturity.
That’s why growing fruit from seed is best viewed as a gardening adventure, rather than a guaranteed way to reproduce the fruit you bought at the grocery store.
🌱 The Best Seeds for Beginners
If you’re completely new to this, I’d start with:
🥑 Avocado — easy to observe and fun to grow
🍋 Lemon — fresh seeds can germinate readily
🍊 Orange — another fun citrus project
🍈 Lime — simple and rewarding
🥭 Mango — exciting to watch develop
Then, once you’re ready for a little more patience, try apples, pears, peaches, and plums.
🫙 Don’t Throw Those Seeds Away!
The next time you’re eating a piece of fruit, look at the seed before tossing it into the trash.
That little seed contains everything necessary to begin a completely new plant.
Not every seed will germinate.
Not every seedling will survive.
And not every tree will eventually produce delicious fruit.
But that’s part of the fun.
A glass, a little water, a seed, some patience—and suddenly you’re growing something from your kitchen scraps. 🌱🥭🍋
It’s an inexpensive gardening experiment, a great project for kids, and a wonderful reminder that there’s a little bit of potential hiding inside some of the foods we eat every day.
🌱 Which fruit seed would you try first?
Avocado, mango, lemon, orange, apple, or something else? 👀🥑🍋
