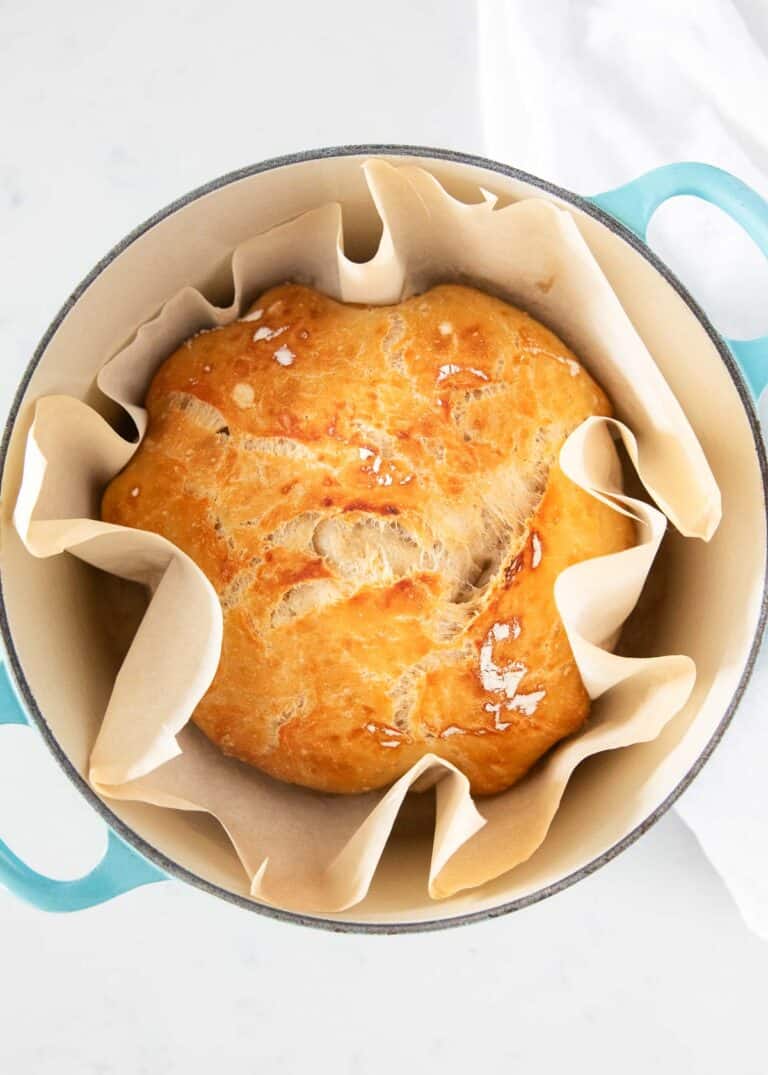
🍞 Easy Dutch Oven No-Knead Bread
There is something magical about homemade bread that looks like it came straight from a bakery—but requires no kneading, no complicated techniques, and no special bread-making experience.
This easy Dutch oven no-knead bread is one of those recipes you’ll want to keep coming back to. The dough takes only a few minutes to mix, then time does most of the work.
The result is a beautiful round loaf with a crackly golden crust and a soft, chewy, airy interior.
🛒 Ingredients
- 3 cups (360 g) all-purpose flour
- 1½ teaspoons salt
- ½ teaspoon instant yeast
- 1½ cups (360 ml) warm water
- 1 teaspoon honey or sugar, optional
- Extra flour or cornmeal, for shaping
You’ll also need:
- A Dutch oven with a lid, preferably 4–6 quarts
- Parchment paper, optional
👩🍳 Instructions
1. Mix the Dough
In a large mixing bowl, combine the flour, salt, and instant yeast.
Add the warm water and honey or sugar if using.
Stir everything together with a wooden spoon or sturdy spatula until no dry flour remains.
The dough will look sticky, shaggy, and messy.
That’s exactly what you want.
Don’t knead it.
2. Cover and Let It Rise
Cover the bowl tightly with plastic wrap, a lid, or a clean kitchen towel.
Let the dough sit at room temperature for approximately 12–18 hours.
Overnight is perfect.
As it rests, the yeast slowly develops the dough’s structure and flavor.
When it’s ready, the dough should look bubbly and noticeably expanded.
3. Shape the Dough
Lightly flour your work surface.
Turn the dough out onto the surface.
Sprinkle a little flour over the top so it isn’t quite so sticky.
Gently shape the dough into a rough ball.
You don’t need to knead it.
Simply fold the edges toward the center a few times and turn the dough over so the seam is underneath.
Try not to add too much flour—the dough should remain soft and slightly tacky.
4. Rest Again
Place the shaped dough on a piece of parchment paper or a lightly floured surface.
Cover loosely with a clean towel and let it rest for about 30–60 minutes.
Meanwhile, prepare your Dutch oven.
5. Preheat the Dutch Oven
Place the Dutch oven and its lid into your oven.
Preheat the oven to 450°F (230°C).
Allow the Dutch oven to heat for approximately 30 minutes.
Be extremely careful when handling it—it will be very hot.
6. Transfer the Dough
Carefully remove the hot Dutch oven.
Using the parchment paper as a sling, lower the dough into the Dutch oven.
If you aren’t using parchment, carefully transfer the dough directly into the pot.
For a rustic appearance, you can lightly dust the top with flour and score it with a sharp knife or bread lame.
Make one deep slash across the top or create a simple cross or decorative pattern.
7. Bake Covered
Put the lid on the Dutch oven.
Bake at 450°F for 30 minutes.
The covered environment traps steam, which helps the bread develop its characteristic crust while allowing the loaf to expand.
8. Bake Uncovered
Remove the lid.
Continue baking for another 10–15 minutes, or until the loaf is a deep golden brown.
If you prefer a particularly dark, crunchy crust, you can give it a few extra minutes, keeping a close eye on it.
9. Cool Completely
Carefully remove the bread from the Dutch oven.
Place it on a wire rack and let it cool for at least 1 hour before slicing.
I know it’s tempting to cut into it immediately—but allowing the bread to cool gives the interior time to finish setting.
Slice too early and you can end up with a gummy interior.
🥖 What Makes No-Knead Bread Work?
The secret isn’t complicated.
Instead of relying on vigorous kneading to develop gluten, this recipe uses a long fermentation period.
The dough sits for many hours while the yeast gradually develops the structure and flavor.
The Dutch oven then creates a steamy baking environment.
Together, these two techniques produce a loaf that can have:
🔥 Crisp crust + 🥖 chewy crumb + ✨ lots of flavor
without all the traditional kneading.
💡 Tips for Perfect No-Knead Bread
Don’t add too much flour.
The dough is supposed to be sticky.
Adding lots of flour can make the finished loaf dense and dry.
Use the right water temperature.
The water should be warm, not hot.
Very hot water can damage or kill yeast.
Give the dough enough time.
The long rise is a major part of the recipe.
If your kitchen is cool, the dough may need more time.
Preheat the Dutch oven.
Starting with a thoroughly heated pot helps the loaf develop a beautiful crust and strong oven spring.
Don’t skip the cooling period.
The bread continues to set as it cools.
🌿 Easy Variations
Once you’ve mastered the basic loaf, it’s easy to customize.
🧄 Garlic & Herb Bread
Add:
- 1 teaspoon garlic powder
- 1 tablespoon dried Italian herbs
- 2 tablespoons grated Parmesan
🧀 Cheesy Bread
Add about 1 cup shredded cheddar, mozzarella, or Parmesan to the dough.
🌿 Rosemary Bread
Add:
- 1–2 tablespoons chopped fresh rosemary
- 1 teaspoon garlic powder
🌶️ Jalapeño Cheddar
Fold in:
- 1 cup shredded cheddar
- 1–2 diced jalapeños
🫒 Olive Bread
Add:
- ¾ cup chopped olives
- 1 teaspoon dried oregano
Be careful when adding wet ingredients or large quantities of mix-ins because they can change the dough’s hydration and handling.
🧈 How to Serve It
This bread is delicious while still slightly warm.
Try serving it with:
- Salted butter
- Garlic butter
- Olive oil and herbs
- Soup
- Chili
- Stews
- Pasta
- Scrambled eggs
- Cheese and charcuterie
- Homemade jam
- Honey
It’s also fantastic toasted the next morning.
🥪 Turn Leftover Bread Into Something Delicious
If you somehow have leftovers, don’t let them go to waste.
Use slices for:
French toast 🍓
Grilled cheese 🧀
Garlic toast 🧄
Croutons 🥗
Bread crumbs 🍞
Breakfast sandwiches 🥚
A rustic loaf like this can become the foundation for several more meals.
🧊 How to Store It
Once completely cool, store the bread at room temperature in a bread bag, paper bag, or loosely covered container.
Avoid refrigerating homemade bread unless necessary, as refrigeration can make bread stale more quickly.
For longer storage, slice the cooled loaf and freeze the slices in an airtight freezer-safe bag.
Then you can take out only what you need.
⭐ Recipe at a Glance
Prep time: 10 minutes
First rise: 12–18 hours
Second rest: 30–60 minutes
Bake time: 40–45 minutes
Cooling time: At least 1 hour
Yield: 1 rustic loaf
❤️ Final Thoughts
If you’ve always thought homemade bread was too complicated, this is a wonderful recipe to start with.
There’s no mixer required.
No complicated kneading technique.
No special bread-making skills.
Just mix the ingredients, cover the bowl, go to bed, and let time work its magic.
The next day, shape it, bake it in a hot Dutch oven, and you’ll have a gorgeous homemade loaf with a crusty exterior and soft, chewy center.
Once you make this bread, don’t be surprised if you stop buying bakery bread altogether. 😍🍞
👇 Would You Try It?
A. 🍞 Absolutely!
B. 🧈 Only if there’s plenty of butter.
C. 🧀 I’d add cheese and herbs.
D. 😍 I already make no-knead bread!
