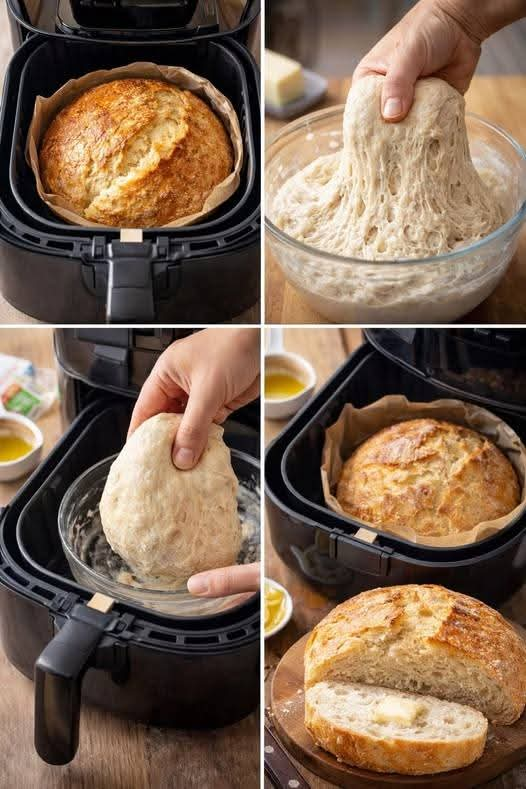
- Prep Time: 15 minutes
- Resting/Proofing Time: 1 hour
- Cook Time: 20 minutes
- Total Time: 1 hour 35 minutes
- Difficulty Level: Easy to Intermediate
- Servings: 6–8 slices
Ingredients
- 2 cups all-purpose flour
- 1 teaspoon instant yeast
- 1 teaspoon sugar
- ½ teaspoon salt
- ¾ cup warm water (not too hot, around 40–45°C)
- 1 tablespoon olive oil
Equipment Needed
- Air fryer
- Mixing bowl
- Wooden spoon or spatula
- Small baking pan (that fits inside your air fryer)
- Clean kitchen towel or plastic wrap
Step-by-Step Instructions
Step 1: Activate the Yeast (Intensity: Low)
In a mixing bowl, combine warm water, sugar, and yeast. Stir gently and let it sit for 5–10 minutes until it becomes frothy. This step ensures your yeast is active and will help the bread rise properly.
Step 2: Prepare the Dough (Intensity: Medium)
Add flour, salt, and olive oil to the yeast mixture. Mix until a rough dough forms. Transfer the dough onto a lightly floured surface and knead for about 8–10 minutes until it becomes smooth and elastic. If the dough is too sticky, add a little more flour, one tablespoon at a time.
Step 3: First Rise (Proofing) (Intensity: Passive)
Place the dough in a lightly greased bowl and cover it with a clean towel or plastic wrap. Let it rest in a warm place for about 1 hour, or until it doubles in size. This step is crucial for developing the bread’s texture and flavor.
Step 4: Shape the Dough (Intensity: Low)
Once the dough has risen, gently punch it down to release air. Shape it into a round or oval loaf, depending on your pan size. Place it into a greased air fryer-safe baking pan.
Step 5: Second Rise (Optional but Recommended) (Intensity: Passive)
Cover the shaped dough and let it rest for another 15–20 minutes. This helps create a lighter, fluffier bread.
Step 6: Preheat the Air Fryer (Intensity: Medium)
Preheat your air fryer to 160°C (320°F) for about 3–5 minutes. Preheating ensures even cooking.
Step 7: Bake the Bread (Intensity: Medium to High)
Place the pan into the air fryer basket. Cook at 160°C (320°F) for 15 minutes. Then increase the temperature to 180°C (356°F) and cook for an additional 5 minutes to achieve a golden crust.
Step 8: Check for Doneness (Intensity: Low)
Tap the top of the bread—if it sounds hollow, it’s done. You can also insert a toothpick; if it comes out clean, the bread is ready.
Step 9: Cool Before Serving (Intensity: Passive)
Remove the bread from the pan and let it cool on a wire rack for at least 15 minutes before slicing. This helps set the structure and prevents it from becoming gummy.
Tips for Perfect Air Fryer Bread
- Temperature Control: Air fryers can vary, so keep an eye on your bread during the last few minutes.
- Don’t Overcrowd: Ensure there’s enough space around the pan for proper air circulation.
- Use Parchment Paper: This can help prevent sticking and make cleanup easier.
- Add Flavor Variations: Mix in herbs, garlic, or cheese for a customized loaf.
Serving Suggestions
Air fryer bread is incredibly versatile. Serve it warm with butter, jam, or honey for breakfast. It pairs beautifully with soups, stews, or salads for lunch or dinner. You can also use it to make sandwiches, toast, or even croutons.
Storage Instructions
- Room Temperature: Store in an airtight container for up to 2 days.
- Refrigerator: Keeps for up to 5 days, though it may dry out slightly.
- Freezer: Wrap tightly and freeze for up to 2 months. Thaw at room temperature and reheat in the air fryer for a few minutes before serving.
Nutritional Information (Per Serving)
- Calories: 180
- Carbohydrates: 32g
- Protein: 5g
- Fat: 3g
- Fiber: 1g
- Sugar: 1g
- Sodium: 150mg
