Waking up to a pale yellow ring on your ceiling can be a frustrating reminder of the storm that passed through last night. While roofers are booked out for weeks, you’re left to wonder about the extent of the damage and what immediate steps you can take to mitigate further issues. Understanding what this stain could mean and knowing how to handle it in the interim can save you from expensive repairs down the line.
Before you dive into the inspection, it’s crucial to approach the situation with a systematic plan. By examining the potential causes and addressing immediate safety concerns, you can reduce the risk of further damage to your home. This guide will walk you through a series of checks and temporary solutions you can implement while waiting for professional help.
1. Start With Safety: Electricity, Sagging Ceilings, And When To Evacuate
The first priority when dealing with a ceiling stain is safety. Water and electricity don’t mix, so if the stain is near light fixtures or electrical outlets, immediately turn off power to that area at the circuit breaker. Additionally, inspect the ceiling for any signs of sagging. A sagging ceiling suggests that water has pooled above, which can lead to collapse. Use a flashlight to check for bulges or soft spots.
If you notice significant sagging or hear dripping sounds, consider evacuating the area and calling in emergency services. It’s better to be safe than sorry, especially if there is a risk of electrical hazards or structural failure.
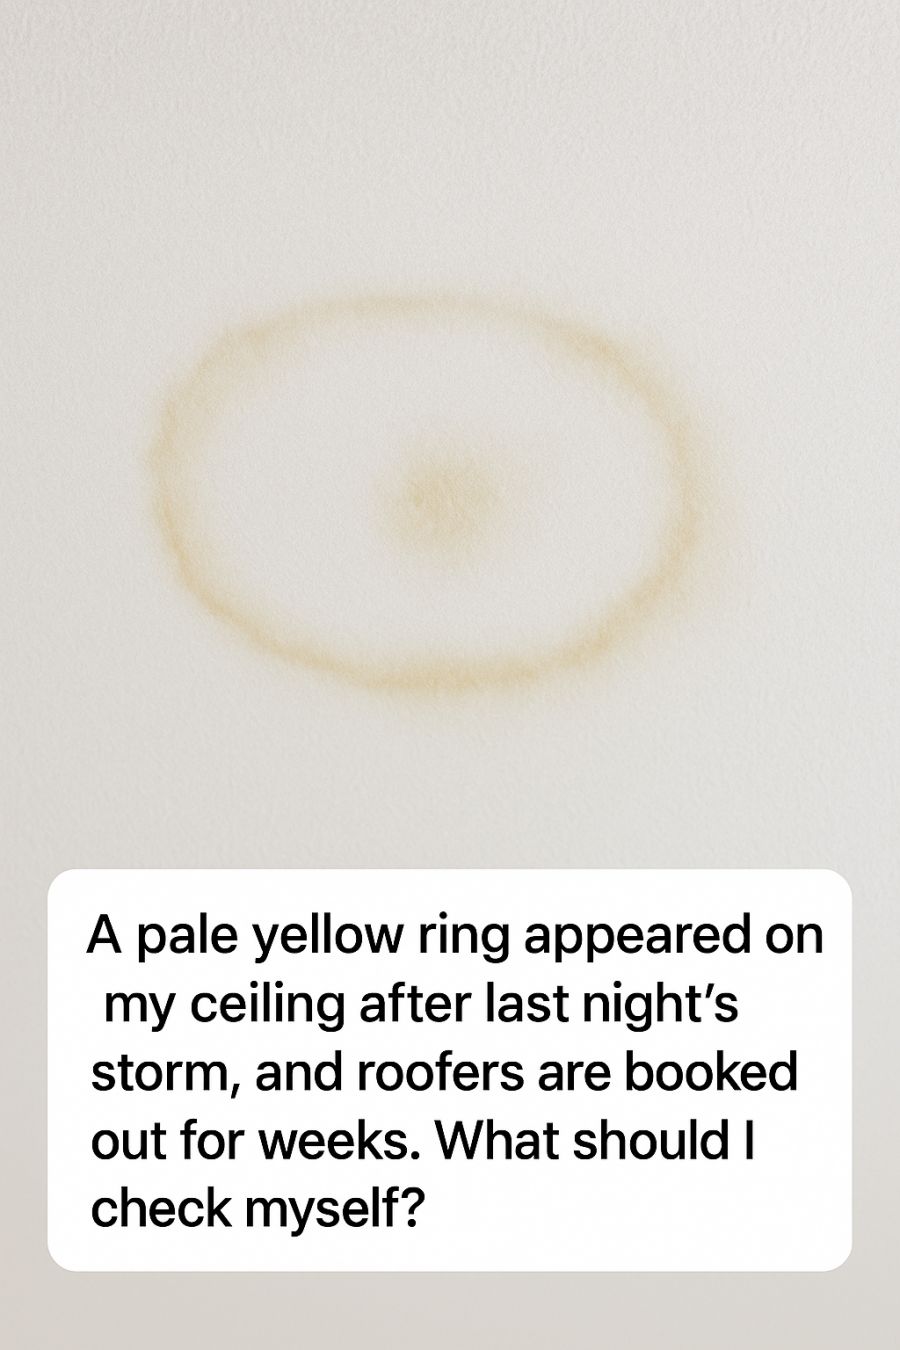
2. Trace The Stain’s Shape And Color To Clues About The Leak
The appearance of the stain can provide clues about the source of the leak. A pale yellow ring often indicates a slow leak, possibly from a small hole or crack. If the stain has a darker center and lighter edges, it suggests ongoing moisture exposure. The shape and spread can help you determine the potential path the water has taken.
Take note of any other discolorations or textures around the stain. A well-defined edge may indicate that the water is seeping through a specific point, whereas a diffuse stain suggests broader saturation.
3. Check The Attic Or Loft Directly Above The Stain
Access the attic or loft space directly above the stain to identify the source of the leak. Use a flashlight to look for any wet insulation, water trails, or mold growth. Pay particular attention to areas where the roof meets walls or where structural elements intersect, as these are common points for leaks to start.
If you find wet insulation, carefully remove it to allow the area to dry. Be sure to wear protective gear, such as gloves and a mask, to avoid exposure to any mold or insulation fibers.
4. Inspect Roof Penetrations: Vents, Chimneys, Skylights, And Satellites
Roof penetrations, such as vents, chimneys, skylights, and satellite dish mounts, are common sources of leaks. Check the flashing around these areas for signs of damage or gaps. Look for cracks in sealant or missing shingles around the penetrations that could allow water to enter.
Use binoculars for a closer look if accessing the roof is challenging. If you notice any obvious damage, consider applying a temporary sealant to prevent further water ingress until repairs can be made.
5. Examine Gutters, Downspouts, And Overflow Paths After The Storm
Clogged gutters and downspouts can cause water to back up and enter the home through the roof. Check for debris accumulation that may have occurred during the storm. Ensure that water is flowing properly away from the house and not pooling near the foundation.
Clear any blockages you find, and consider installing gutter guards to prevent future clogs. If gutters appear damaged or improperly sloped, they may require professional adjustment or repair.
6. Look For Missing Shingles, Lifted Edges, And Exposed Nail Heads
After ensuring safety and checking obvious areas, inspect the roof itself for visible damage. Missing shingles, lifted edges, or exposed nail heads are clear indicators of potential leak points. Use binoculars or a drone for a safe inspection if going onto the roof is unsafe.
If you notice any missing shingles or other damage, try to locate any loose or fallen materials that may have been dislodged during the storm. These can sometimes be temporarily re-secured to prevent additional water damage.
7. Test For Active Moisture Using Tissue, Tape, Or A Moisture Meter
Determine if the stain is caused by an active leak by testing the area for moisture. Press a piece of dry tissue against the ceiling stain and tape it in place. Check the tissue after a few hours to see if it becomes wet. Alternatively, use a moisture meter for a more accurate reading.
If the tissue or meter indicates moisture, the leak is active, and you should continue monitoring the situation closely. This information can also be valuable for roofers or insurance adjusters later.
8. Use The Painter’s Pin-Hole Trick To Relieve Trapped Water Safely
If the ceiling bulges with water, use a small pin to carefully puncture the lowest point. This will allow the water to drain and relieve pressure on the ceiling structure, potentially preventing further damage or collapse.
Place a bucket or container beneath the puncture to catch the water. This technique can minimize the risk of a larger break or sag if the water continues to accumulate.
9. Document Everything For Insurance And Future Roof Repair
Thorough documentation is crucial for insurance claims and future repairs. Take clear photographs of the stain, any attic findings, and roof damage. Note the date and time of discovery, and keep a record of any actions you’ve taken.
Contact your insurance company to report the damage and inquire about coverage. Providing comprehensive documentation can expedite the claims process and ensure you receive the compensation needed for repairs.
10. Do A Temporary Interior Fix: Stain Containment And Odor Control
To manage the appearance of the stain and any associated odors, consider a temporary interior fix. Apply a stain-blocking primer to the affected area to prevent the stain from spreading or yellowing further. This won’t solve the underlying issue, but it can improve the room’s appearance.
Use fans and dehumidifiers to dry the area and prevent mold growth. If odors persist, an air purifier with a HEPA filter can help improve air quality.
11. Try Simple Exterior Stop-Gaps: Roof Cement, Tarps, And Sealant Hacks
While waiting for professional repairs, some temporary exterior fixes can help. Apply roof cement or a waterproof sealant to small cracks or gaps. For larger issues, secure a tarp over the affected area to prevent further water ingress.
Ensure the tarp is tightly secured with ropes or bungee cords to withstand wind and rain. These measures won’t replace a professional repair but can buy you time until help arrives.
12. Decide When To Call In Pros Sooner: Red-Flag Signs You Shouldn’t Ignore
While some issues can be temporarily managed, certain red flags require immediate professional intervention. These include extensive ceiling sagging, widespread mold growth, or significant structural damage. If you experience repeated leaks or if temporary fixes fail to hold, it’s crucial to prioritize professional help.
Contact multiple roofers to see if emergency services are available or if any can accommodate your situation sooner. The safety and integrity of your home should always be the top priority.
