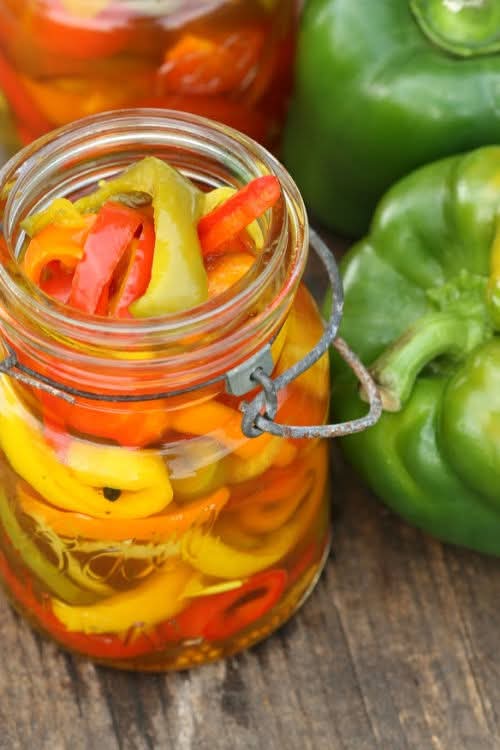
(Water Bath Canned)
These pickled bell peppers are crisp, colorful, and packed with sweet-tangy flavor. They’re delicious on sandwiches, burgers, salads, pizzas, charcuterie boards, or served alongside grilled meats. Because they’re preserved in a properly acidified vinegar brine, they can be processed in a water bath canner for shelf-stable storage.
Prep Time: 25 minutes
Processing Time: 15 minutes (adjust for altitude if needed)
Yield: About 4 pint jars
Ingredients
- 4–5 large bell peppers (any color), sliced into strips
- 3 cups white vinegar (5% acidity)
- 3 cups water
- 2 tablespoons pickling or canning salt
- 2 tablespoons granulated sugar (optional, for a slightly sweeter brine)
Optional Flavorings (per pint jar)
- 1 clove garlic
- 1 teaspoon mustard seeds
- ½ teaspoon black peppercorns
- ½ teaspoon celery seed
- ¼ teaspoon red pepper flakes (optional)
- 1 small sprig fresh dill
Equipment
- Water bath canner
- 4 clean pint canning jars
- New canning lids and bands
- Jar lifter
- Canning funnel
- Bubble remover or plastic utensil
Instructions
Step 1: Prepare the Peppers
Wash the peppers thoroughly.
Remove the stems, seeds, and membranes.
Slice into strips or rings, depending on your preference.
Step 2: Prepare the Jars
Wash the jars, lids, and bands.
Keep the jars hot until you’re ready to fill them.
Step 3: Make the Brine
In a large saucepan, combine:
- White vinegar
- Water
- Pickling salt
- Sugar (if using)
Bring the mixture to a gentle boil, stirring until the salt and sugar dissolve completely.
Step 4: Fill the Jars
If using, place the optional spices and garlic into each hot jar.
Pack the sliced peppers firmly into the jars, leaving ½ inch of headspace.
Pour the hot brine over the peppers, maintaining ½ inch of headspace.
Remove any air bubbles with a bubble remover or plastic utensil, then adjust the headspace if needed.
Wipe the rims clean, place the lids on the jars, and screw the bands on until fingertip-tight.
Step 5: Water Bath Process
Place the filled jars into a boiling water bath canner, ensuring they are covered by at least 1 inch of water.
Once the water returns to a full boil, process pint jars for 15 minutes. Increase the processing time if required for your altitude by following current home canning guidance.
Step 6: Cool
Carefully remove the jars and place them on a towel.
Let them cool undisturbed for 12–24 hours.
After cooling, check that each lid has sealed. The center of the lid should not flex when pressed.
Storage
Store sealed jars in a cool, dark place. For the best quality, use within 1 year.
After opening, refrigerate and use within 2–4 weeks.
Tips for the Best Pickled Peppers
- Use fresh, firm peppers without bruises.
- Do not reduce the amount of vinegar or substitute a lower-acidity vinegar, as this can make the recipe unsafe for water bath canning.
- Allow the peppers to sit for 1–2 weeks before opening so the flavors can fully develop.
- Mix red, yellow, orange, and green peppers for a colorful presentation.
Delicious Ways to Enjoy Pickled Bell Peppers
- Layer them on sandwiches and burgers.
- Add them to salads and grain bowls.
- Top pizzas and flatbreads.
- Serve on charcuterie boards.
- Stir them into pasta salads.
- Pair them with grilled chicken, steak, or sausage.
- Chop and mix into cream cheese for a quick spread.
Final Thoughts
These homemade pickled bell peppers are easy to make, full of bright flavor, and a wonderful way to preserve fresh peppers. With a properly acidified brine and water bath processing, you can enjoy a pantry stocked with crisp, tangy peppers ready to brighten meals all year long. 🌶️🫑🥒
