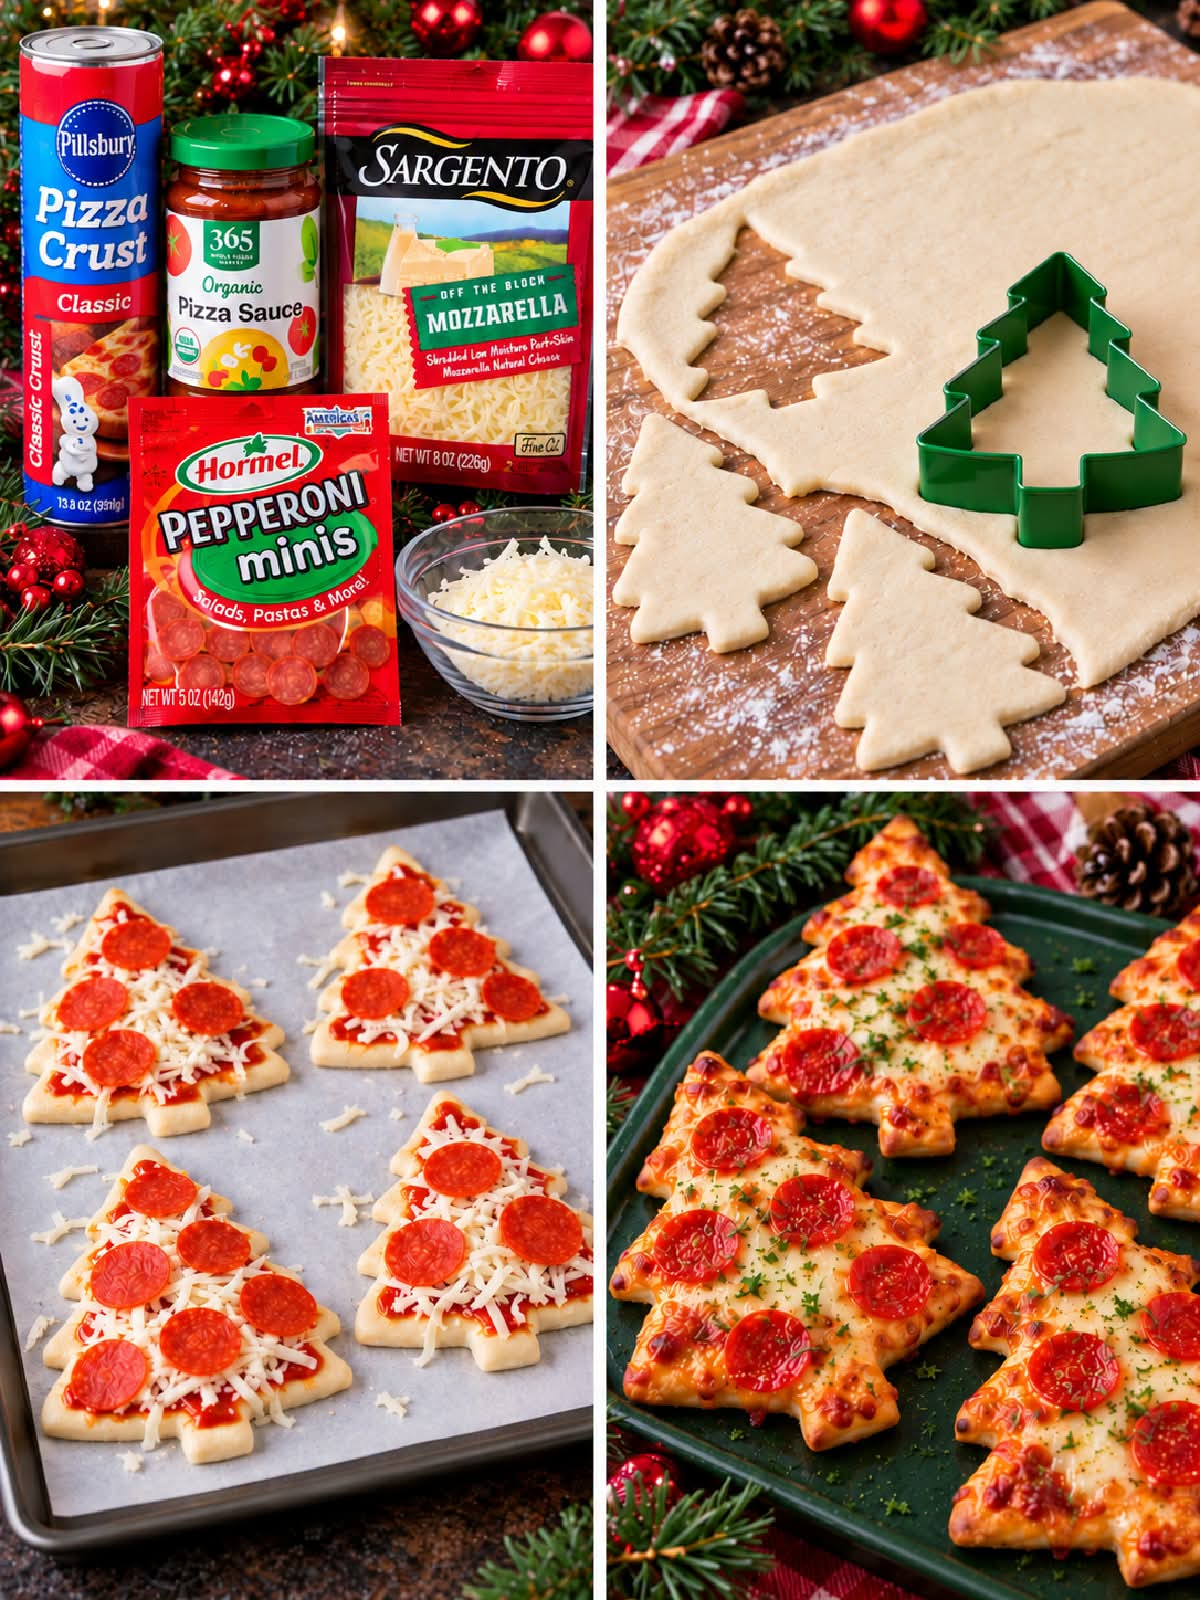
🎄 Air Fryer Christmas Tree Pizza Bites 🍕🎅
Easy, Cheesy, Festive, and Perfect for the Holidays!
Looking for a fun and delicious appetizer to serve during the holiday season? These Air Fryer Christmas Tree Pizzas are the perfect combination of crispy pizza crust, tangy tomato sauce, gooey melted mozzarella, and savory pepperoni—all shaped like adorable little Christmas trees! 🎄🍕
They’re easy to prepare, require just a handful of ingredients, and cook quickly in the air fryer. Whether you’re planning a Christmas party, preparing snacks for the family, or looking for a festive activity to enjoy with the kids, these mini pizzas are guaranteed to bring a little extra holiday cheer to the table.
The best part? You don’t need to make pizza dough from scratch. Refrigerated pizza crust makes preparation simple, while a Christmas tree cookie cutter gives each pizza its festive shape.
Serve them hot from the air fryer with extra pizza sauce for dipping, and watch them disappear!
🛒 Ingredients
Preparation time: 10–15 minutes
Cooking time: 5–8 minutes per batch
Total time: Approximately 25–35 minutes
Servings: 8–12 mini pizzas, depending on cutter size
For the Christmas Tree Pizzas
- 1 can refrigerated pizza crust dough (approximately 13–14 ounces / 370–400 g)
- ½ cup pizza sauce
- 1–1½ cups shredded mozzarella cheese
- ¼ cup mini pepperoni slices
- ½ teaspoon Italian seasoning, optional
- ½ teaspoon garlic powder, optional
- Olive oil spray, optional
Optional Toppings
- Grated Parmesan cheese
- Chopped fresh parsley
- Dried oregano
- Red bell pepper, finely diced
- Green bell pepper, finely diced
- Extra pizza sauce for dipping
Helpful tip: Use a Christmas tree-shaped cookie cutter that fits comfortably inside your air fryer basket. If your cutter is too large, make smaller trees or use a knife to cut simple tree shapes by hand.
👩🍳 Instructions: How to Make Air Fryer Christmas Tree Pizzas
Step 1: Prepare the Pizza Dough
Open the refrigerated pizza dough and unroll it onto a lightly floured cutting board or clean work surface.
If the dough is uneven, gently roll it out until it has a relatively uniform thickness of about ¼ inch (6 mm), following the dough package’s instructions.
Try not to make the dough too thin, because the trees need to hold their shape while cooking and support the toppings.
Step 2: Cut Out the Christmas Trees
Use a Christmas tree-shaped cookie cutter to cut as many trees as possible from the dough.
Press the cutter firmly through the dough, then lift it straight up to keep the edges neat.
Gather the remaining dough scraps and gently press them together. Roll them out again and cut additional trees.
Avoid repeatedly kneading the dough, as this can make it tougher.
Place the cutouts on a piece of parchment paper while you prepare the toppings.
No Christmas tree cutter? No problem! Use a small knife to cut simple tree shapes with a triangular top and a short trunk at the bottom.
Step 3: Preheat the Air Fryer
Preheat your air fryer to 350°F (175°C) for approximately 2–3 minutes, if your model recommends preheating.
Air fryers vary in how they heat, so check your appliance’s instructions and adjust the temperature if necessary.
For the best results, cook the pizzas in a single layer. Depending on the size of your basket, you may need to work in several batches.
Step 4: Prepare the Air Fryer Basket
Lightly coat the air fryer basket with a little oil spray if needed to prevent sticking.
If you use parchment paper, choose parchment specifically designed for air fryers and follow the manufacturer’s instructions. Never place loose parchment in the air fryer during preheating, because the circulating air can lift it into the heating element.
For this recipe, the simplest approach is to place the dough directly in a lightly greased basket.
Step 5: Add the Pizza Sauce
Arrange the Christmas tree dough cutouts in a single layer, leaving a little space between each piece.
Spread a thin layer of pizza sauce over each tree, leaving a small border around the edges.
Avoid adding too much sauce. Excess moisture can make the centers soft and prevent the crust from cooking evenly.
For extra flavor, mix a pinch of garlic powder or Italian seasoning into the sauce before spreading it over the dough.
Step 6: Add the Mozzarella Cheese
Sprinkle shredded mozzarella evenly over each tree.
Mozzarella melts beautifully and gives these mini pizzas their classic cheesy finish.
Keep the cheese mostly within the edges of the dough to reduce dripping into the basket.
If you love a stronger flavor, add a light sprinkle of Parmesan or Italian seasoning.
Step 7: Add the Pepperoni
Place mini pepperoni slices over the cheese.
For a festive appearance, arrange the pepperoni like little red ornaments scattered across the tree.
You can also use finely diced red and green bell peppers for colorful toppings.
If you prefer a vegetarian version, leave out the pepperoni and use mushrooms, olives, bell peppers, or your favorite vegetable toppings. Keep vegetable toppings small and avoid adding too much moisture.
Step 8: Air Fry Until Golden and Bubbly
Carefully cook the mini pizzas at 350°F (175°C) for approximately 5–8 minutes.
Check them after about 4–5 minutes, especially if your air fryer tends to cook quickly.
The pizzas are ready when:
- The edges are golden brown.
- The dough is cooked through.
- The cheese has melted and is bubbling.
- The pepperoni is heated and slightly crisp around the edges.
Cooking time will vary with the thickness of the dough, the size of the trees, and your air fryer model. Smaller trees may cook faster, while thicker ones may need additional time.
If the cheese is browning too quickly before the dough is cooked, lower the temperature slightly and continue cooking until the crust is done.
Important: Do not overcrowd the basket. Cooking in batches allows hot air to circulate around the pizzas, helping them cook more evenly.
Step 9: Add the Finishing Touches
See Continuation On Next Page 👇
