Big, Soft & Gooey Cinnamon Rolls
If you love cinnamon rolls with fluffy centers, generous layers of buttery cinnamon filling, and that irresistible cream cheese frosting, this recipe is worth saving.
And here’s the fun part: there are two ways to shape cinnamon rolls.
The traditional method is to roll the entire sheet of dough into one long log and slice it into individual rolls. But if you’re making jumbo rolls—or simply like having more control over every roll—you can cut the dough into strips first and roll each strip individually.
Both methods work beautifully. The best choice depends on the size, consistency, and appearance you want.
Ingredients
For the Dough
- 1 cup warm whole milk, about 105–110°F
- 2 ¼ teaspoons active dry yeast
- ¼ cup granulated sugar
- 2 large eggs, room temperature
- ½ cup unsalted butter, melted and slightly cooled
- 1 teaspoon salt
- 4 to 4 ½ cups all-purpose flour
For the Cinnamon Filling
- ½ cup unsalted butter, softened
- 1 cup packed light brown sugar
- 2 tablespoons ground cinnamon
- 1 teaspoon vanilla extract
- ¼ teaspoon salt
For the Cream Cheese Frosting
- 4 ounces cream cheese, softened
- ¼ cup unsalted butter, softened
- 1 ½ cups powdered sugar
- 1 teaspoon vanilla extract
- 1–2 tablespoons milk or heavy cream
- Pinch of salt
Instructions
1. Activate the Yeast
Pour the warm milk into a large mixing bowl.
Add the yeast and a teaspoon of the sugar. Stir gently and let it sit for about 5–10 minutes.
The mixture should become slightly foamy.
If nothing happens, your yeast may be inactive or the milk may have been too hot or too cold.
2. Make the Dough
Add the remaining sugar, eggs, melted butter, and salt.
Mix until combined.
Gradually add 4 cups of flour, mixing until a soft dough forms. Add additional flour, a tablespoon at a time, only if needed.
The dough should be soft and slightly tacky—not dry or stiff.
3. Knead
Turn the dough onto a lightly floured surface and knead for about 7–10 minutes.
You can also use a stand mixer fitted with a dough hook and knead until the dough becomes smooth and elastic.
Place the dough in a lightly greased bowl, cover, and let it rise in a warm place for about 1–1½ hours, or until doubled in size.
4. Prepare the Filling
While the dough rises, combine the brown sugar, cinnamon, and salt.
Keep the softened butter separate so it can be spread evenly over the dough.
5. Roll Out the Dough
Punch down the risen dough gently.
Roll it into a large rectangle, approximately 18 × 24 inches.
Try to keep the thickness as even as possible from edge to edge.
Spread the softened butter over the entire surface, leaving a small border around the edges.
Sprinkle the cinnamon-sugar mixture evenly over the butter.
Gently press the filling into the dough with your hands or a rolling pin.
Team Log & Slice
This is the traditional cinnamon-roll method.
Starting from one long edge, roll the entire sheet tightly but gently into one long log.
Try to keep the roll firm without squeezing the filling out.
When you reach the end, pinch the seam closed.
Using unflavored dental floss or a very sharp knife, divide the log into approximately 12 large rolls.
For jumbo bakery-style rolls, cut the log into 9–10 pieces instead.
Why use this method?
Rolling the entire sheet at once creates a continuous spiral throughout the log.
It is:
- Fast and efficient
- Easy when making large batches
- Great for consistent production
- The traditional bakery-style technique
- Usually easier when you’re making many rolls at once
The biggest challenge is keeping the log evenly rolled from one end to the other.
Team Cut & Roll
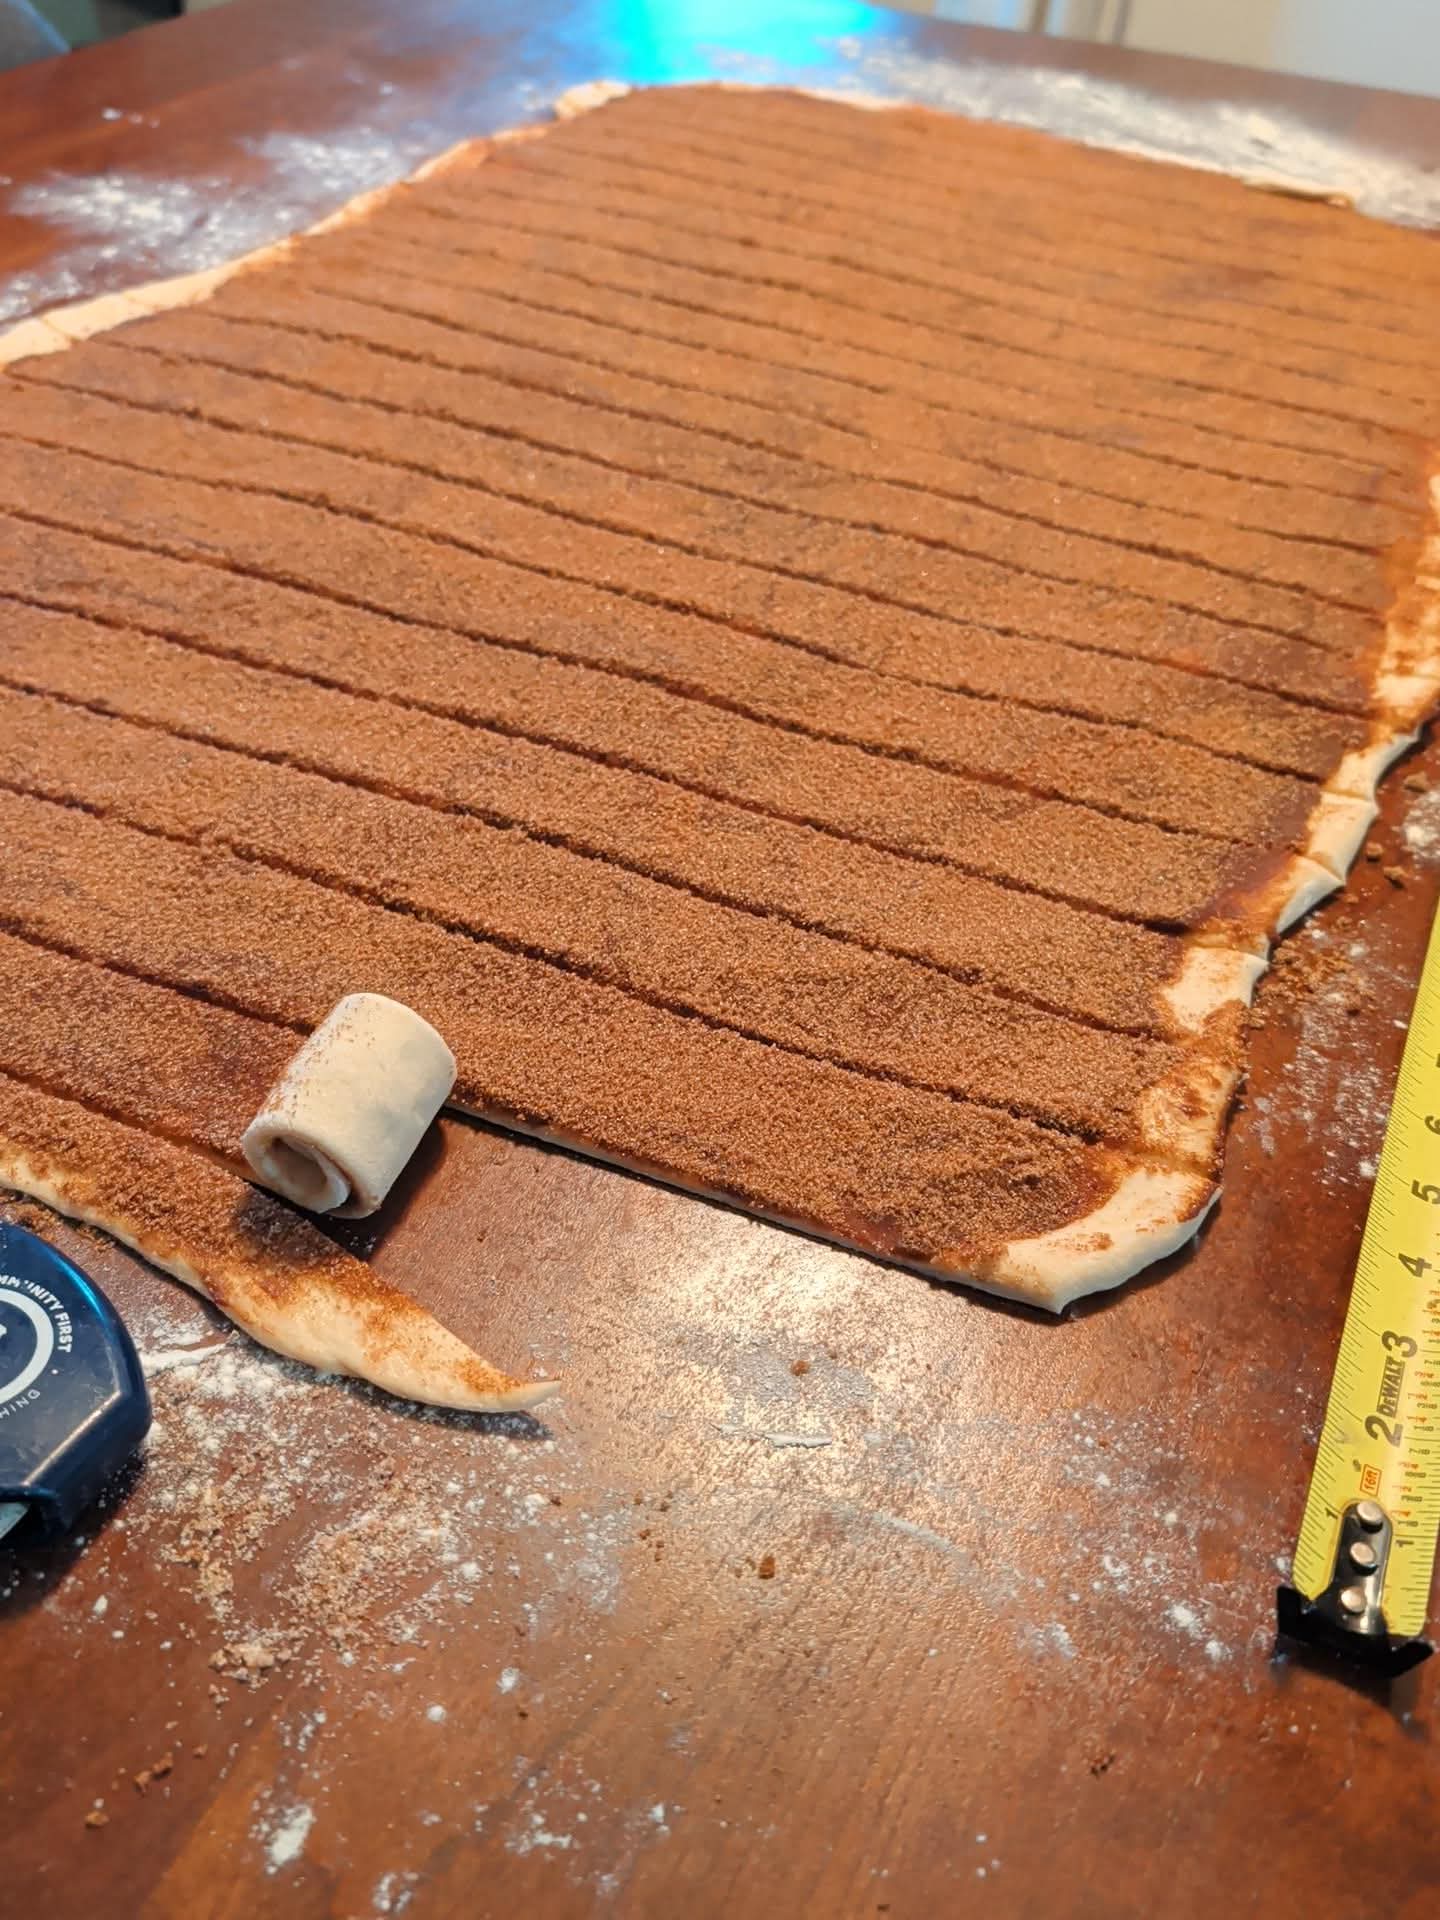
This is the method that gives you more individual control.
Instead of rolling the entire rectangle into one giant log, divide the dough into equal strips.
For example, if your rectangle is 24 inches wide and you want 12 rolls, cut it into 12 strips, approximately 2 inches wide.
Each strip should contain the same amount of filling.
Starting at one end of a strip, roll it up into a spiral.
Tuck the loose end underneath the roll and place it seam-side down in your baking dish.
Repeat with the remaining strips.
Why use this method?
This technique can be especially useful for jumbo cinnamon rolls.
You can control:
- The diameter of each roll
- How tightly each roll is wound
- The number of layers
- The amount of filling in each roll
- The final shape
- How tightly the center is rolled
It’s also easier to correct a roll that isn’t shaping the way you want.
For small batches or oversized rolls, this method can be surprisingly convenient.
Which Method Produces Better Rolls?
There isn’t a universal winner.
The bigger factors are usually dough consistency, filling distribution, rolling tension, proofing, and baking technique.
Even Baking
The most important factor is keeping the rolls approximately the same size.
If some rolls are much larger than others, they won’t finish baking at the same time regardless of how they were shaped.
Height and Rise
Neither shaping method automatically makes a roll rise higher.
The final height is influenced heavily by yeast activity, dough development, proofing, and how tightly the rolls are shaped.
Don’t roll them so tightly that the dough has no room to expand.
Filling Leakage
A little filling escaping is completely normal.
However, excessive leakage can happen when:
- Too much butter is used
- The filling is extremely loose
- The dough is rolled too tightly
- The edges aren’t sealed
- The filling is distributed unevenly
Leave a small border around the edges and avoid piling extra filling directly on the seam.
Layers Separating
If the rolls are loosely wound, the layers may separate during proofing or baking.
If they’re wound extremely tightly, however, the center may have difficulty expanding.
Aim for a snug spiral rather than a compressed spiral.
Centers Popping Up
A raised or popped-up center can happen when the roll is wound unevenly or too tightly.
When shaping, try to keep the tension consistent from beginning to end.
Tucking the final end underneath the roll can also help keep everything in place.
The Second Rise
Place the shaped rolls in a greased 9 × 13-inch baking dish, leaving a little space between them.
Cover loosely and let them rise for another 30–45 minutes, or until noticeably puffy.
For extra-large rolls, you may need a little longer.
Don’t rely exclusively on the clock. Look for the dough to become visibly expanded and soft.
Bake
Preheat your oven to 350°F (175°C).
Bake for approximately 22–28 minutes, depending on the size of your rolls.
The tops should be lightly golden and the centers should be cooked through.
For very large rolls, baking may take several additional minutes.
If the tops brown too quickly, loosely cover them with foil during the final portion of baking.
Let the rolls cool for about 10–15 minutes before frosting.
Make the Cream Cheese Frosting
Beat the softened cream cheese and butter until smooth.
Add powdered sugar, vanilla, and a pinch of salt.
Beat until creamy.
Add milk or heavy cream, a little at a time, until you reach your preferred consistency.
Spread the frosting over the warm cinnamon rolls.
For ultra-gooey rolls, frost them while they’re still warm enough for the frosting to melt slightly into the spirals.
Tips for Preorder-Worthy Cinnamon Rolls
If you’re planning to sell these, consistency becomes much more important than which shaping method you choose.
Weigh Your Dough
Instead of eyeballing each roll, divide the dough by weight.
This makes a huge difference when you’re trying to produce identical rolls.
Weigh the Filling
The same amount of filling in every roll gives you much more consistent spirals and baking times.
Use the Same Pan Size
Changing the pan can dramatically change how the rolls spread and rise.
Don’t Over-Flour
Too much flour creates a dense, dry roll.
A slightly tacky dough usually produces a softer finished product.
Keep Your Rolling Thickness Consistent
Uneven dough thickness means uneven rolls.
Take your time when rolling the rectangle.
Give Them Enough Proofing Time
Under-proofed rolls can be dense and tight.
Over-proofed rolls can lose structure.
Look for rolls that are visibly puffy and expanded rather than relying only on a specific number of minutes.
Make-Ahead Option
Prepare and shape the rolls, then cover the pan tightly and refrigerate overnight.
The next day, let them sit at room temperature until they become noticeably puffy before baking.
This makes them especially convenient for breakfast or brunch.
Storage
Store frosted cinnamon rolls in an airtight container in the refrigerator because of the cream cheese frosting.
For best texture, gently warm individual rolls before serving.
Unfrosted rolls can also be frozen for longer storage. Thaw and warm them before frosting.
Final Verdict: Team Cut & Roll or Team Log & Slice?
If you’re making large batches, the traditional Log & Slice method is efficient and produces beautiful, consistent spirals once you get the technique down.
If you’re making jumbo rolls, experimenting with your recipe, or want maximum control over each individual roll, Cut & Roll is a perfectly reasonable technique.
And honestly, the most important thing isn’t which team you’re on.
It’s getting that dough soft, keeping the filling evenly distributed, shaping with consistent tension, and proofing the rolls properly.
So now I’m curious…
Team Cut & Roll 🙋♀️ or Team Log & Slice 👀?
Which method gives you the cinnamon rolls you love most?
If you’re developing these for preorders, I’d lean toward choosing one method and then standardizing the dough weight, filling weight, roll diameter, proofing time, and baking time. That’s what will make every batch look like it came from the same bakery.
