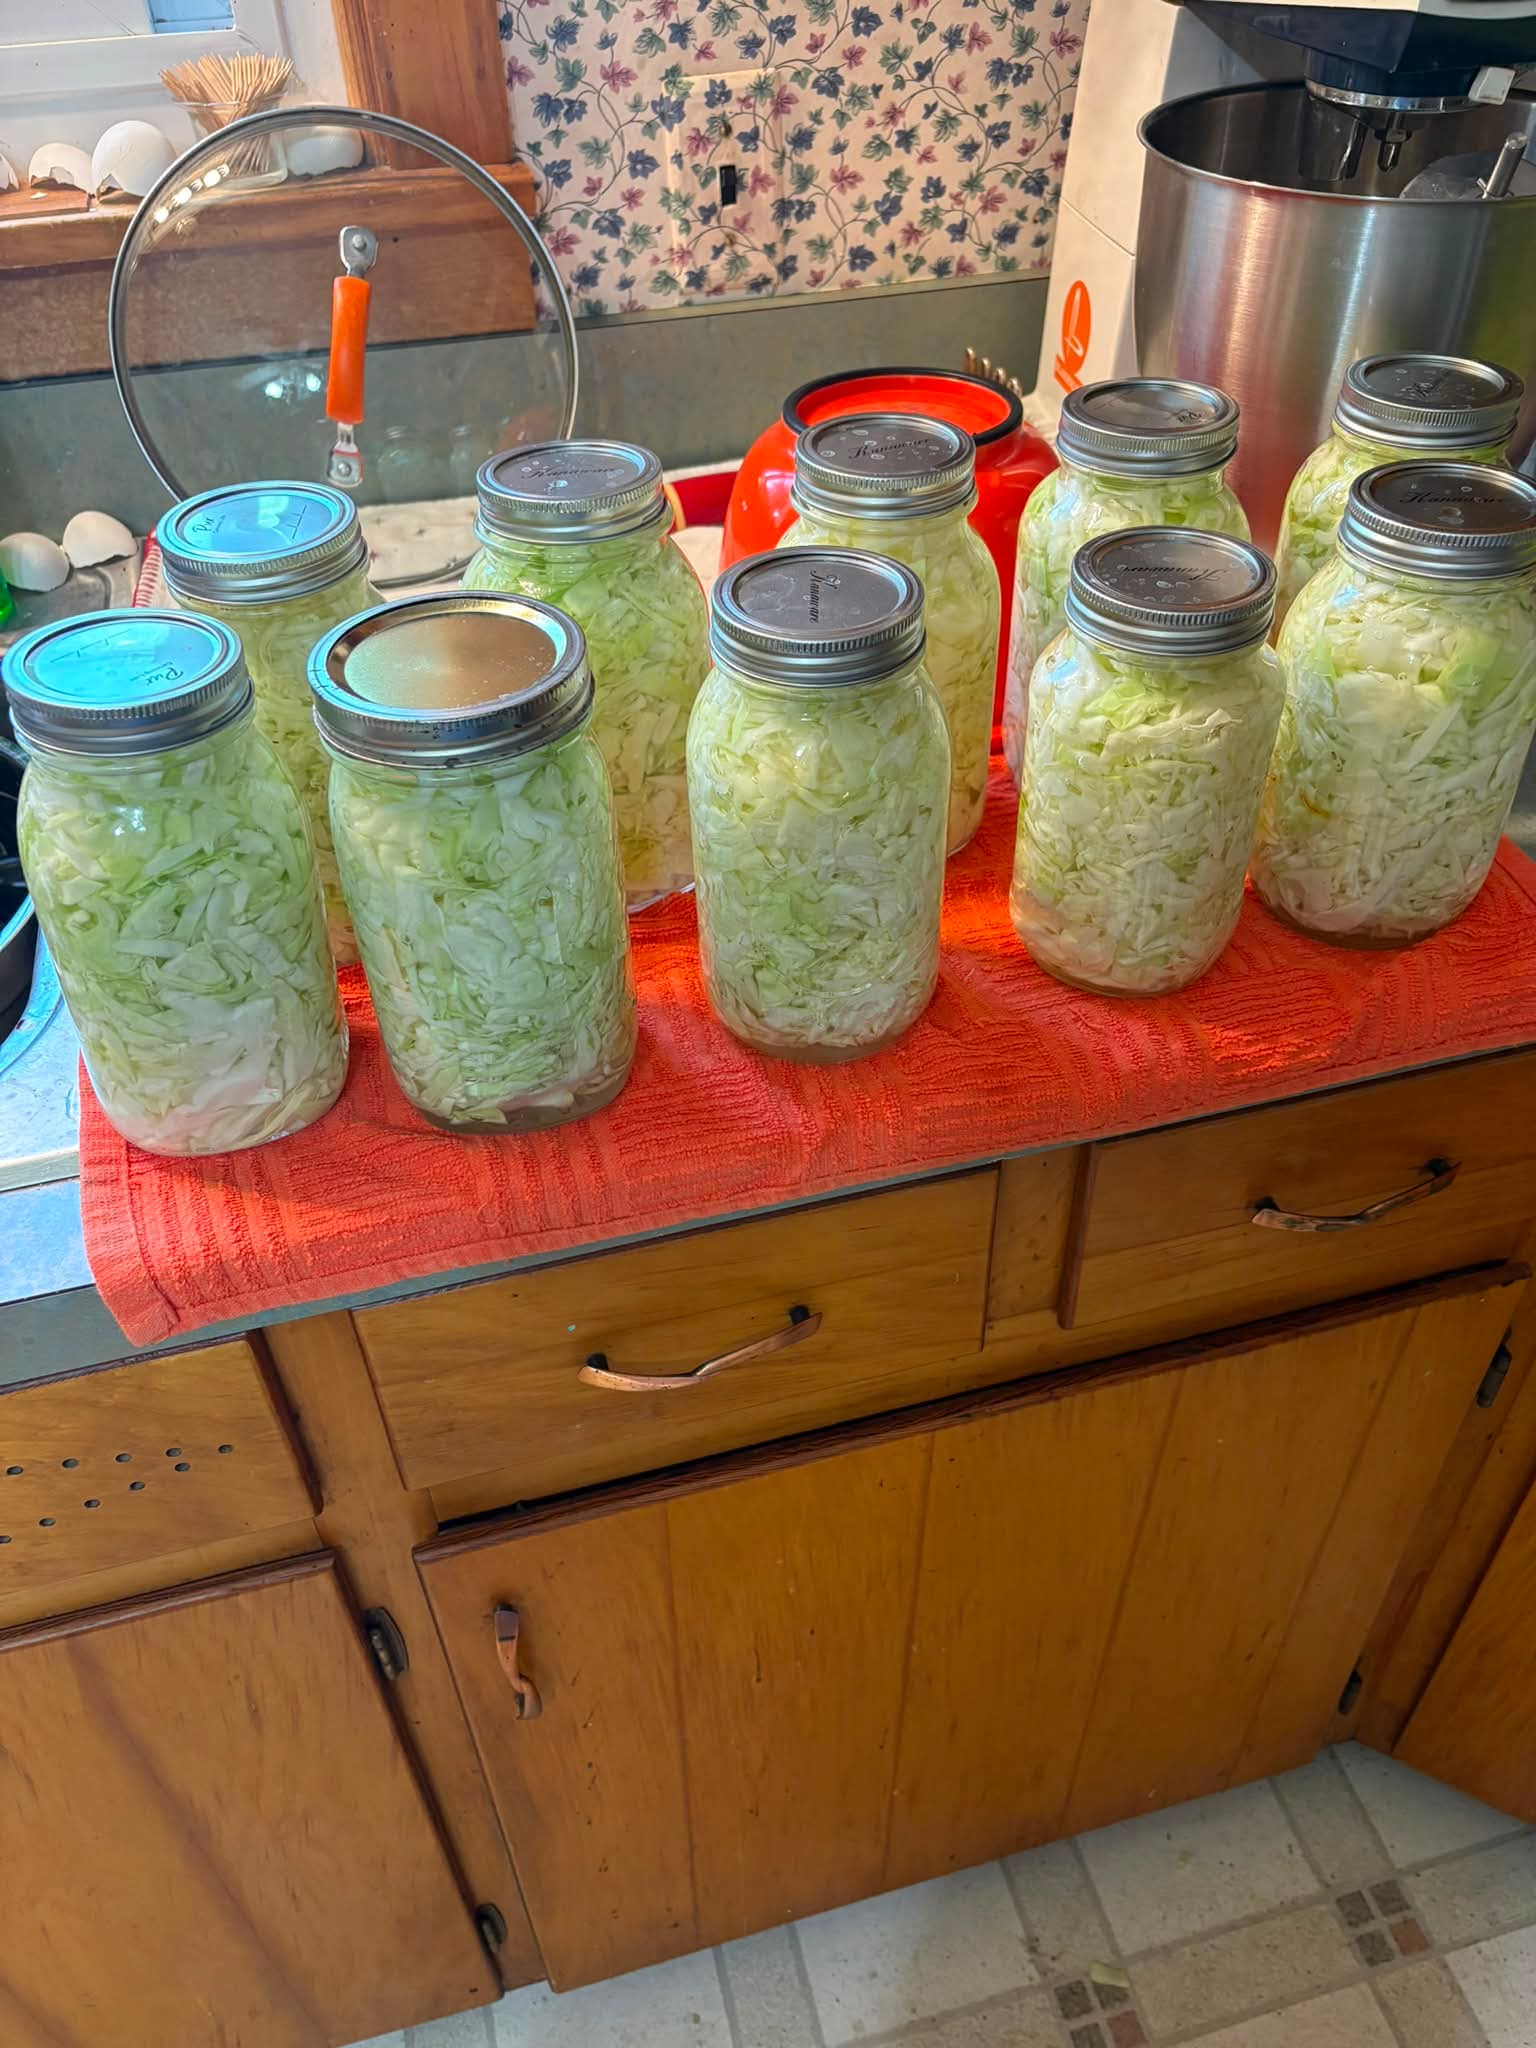
I can turn this into a full recipe, but I’d make one important safety correction: I wouldn’t recommend the “fill jars with boiling water, seal them, and leave them for 30 days” method as written. For fermented sauerkraut, the salt concentration and keeping the cabbage submerged are important, and USDA/NCHFP guidance recommends a controlled fermentation rather than simply sealing jars of cabbage and boiling water. (Cnpaad)
Easy Homemade Sauerkraut Recipe 🥬
If you’ve never made sauerkraut at home, it can seem intimidating—but the basic process is surprisingly simple.
All you really need is fresh cabbage, canning or pickling salt, and a little patience. The cabbage ferments naturally, developing the tangy flavor and crisp texture we associate with sauerkraut.
This version follows a tested fermentation method rather than sealing cabbage with boiling water.
🥬 Ingredients
For about 1 quart of sauerkraut:
- 2½ pounds fresh green cabbage
- 1½ tablespoons canning or pickling salt
You can scale the recipe up as needed. The National Center for Home Food Preservation’s tested recipe uses 3 tablespoons of salt for each 5 pounds of shredded cabbage. (Cnpaad)
Equipment
- Large clean bowl
- Sharp knife or cabbage shredder
- Clean fermentation container or food-grade glass jar
- Fermentation weight
- Clean cover or fermentation lid
- Clean utensils
👩🍳 Instructions
1. Prepare the cabbage
Remove the outer leaves from the cabbage and rinse the head under cold running water.
Cut the cabbage into quarters and remove the tough core.
Slice or shred the cabbage into thin strips.
The thinner the cabbage, the more quickly the salt can draw out its natural juices.
2. Add the salt
Place the shredded cabbage in a large bowl.
Sprinkle the measured canning or pickling salt over it.
Using clean hands, mix and massage the cabbage thoroughly.
Continue working the cabbage until it begins to soften and release plenty of liquid.
The salt is not simply for flavor—it plays an important role in the fermentation process by favoring desirable bacteria while helping inhibit other microorganisms. For fermented sauerkraut, don’t reduce the amount of salt in a tested recipe. (Cnpaad)
3. Pack the cabbage
Firmly pack the salted cabbage into your clean fermentation container.
Press it down as you go so that the cabbage becomes tightly packed and its natural juices rise to cover it.
The cabbage should remain under the liquid during fermentation. NCHFP recommends keeping fermenting cabbage about 1–2 inches beneath the brine. (Cnpaad)
If the cabbage doesn’t produce enough liquid to cover it, use a prepared brine rather than simply pouring boiling water into the jar.
4. Add a fermentation weight
Place a clean fermentation weight on top of the cabbage.
The purpose is to keep the cabbage submerged beneath the brine.
This is important because exposed cabbage can develop mold or spoilage.
5. Cover the container
Cover the fermentation container in a way that protects the cabbage from insects and contamination while allowing fermentation gases to escape.
If you’re using a fermentation vessel with an appropriate fermentation lid or airlock, follow the manufacturer’s instructions.
6. Let it ferment
Keep the sauerkraut around 70–75°F (21–24°C) while it ferments.
At this temperature, properly prepared sauerkraut generally takes about 3–4 weeks to fully ferment. Cooler temperatures can take longer. (Cnpaad)
So your idea of giving it roughly a month is actually in the right general range—but the fermentation temperature and keeping the cabbage submerged matter.
7. Check the sauerkraut
During fermentation, you may notice bubbling and changes in aroma and texture.
If you see surface scum or other issues, follow established fermentation guidance rather than simply sealing the container and continuing to store it.
If there are clear signs of spoilage, such as an obviously rotten appearance or odor, don’t taste it to see whether it’s safe.
8. Taste when fermentation is complete
After approximately 3–4 weeks at 70–75°F, taste a small amount when the fermentation appears complete.
If you like the flavor and texture, it’s ready for storage.
If you want a stronger, more developed sour flavor, fermentation can take longer depending on temperature and your preferred taste.
9. Refrigerate
Once fermentation is complete, transfer the sauerkraut to clean containers, keep it covered with its brine, and refrigerate.
Properly fermented sauerkraut can be kept refrigerated for several months. (Cnpaad)
🧂 What Kind of Salt Should You Use?
For the most consistent results, use canning or pickling salt.
Avoid changing the salt quantity in a tested fermented-sauerkraut recipe. The salt affects both the fermentation and the final texture. (Cnpaad)
🫙 Can You Ferment Sauerkraut in Mason Jars?
Yes, fermentation in quart and half-gallon Mason jars is possible, although NCHFP notes that using jars can result in more spoilage losses than using larger fermentation containers. (Cnpaad)
If you use jars, the most important points are to:
- Use clean, food-safe equipment.
- Keep the cabbage completely submerged.
- Use the correct amount of salt.
- Allow fermentation gases to escape appropriately.
- Monitor the fermentation.
- Refrigerate the finished sauerkraut.
⚠️ About the Boiling-Water Method
You may have seen recipes that say to pack cabbage into jars, poke a hole through the center, add salt, fill with boiling water, put on the lid, and leave the jars for 30 days.
I wouldn’t recommend publishing that method as a tested sauerkraut recipe.
Traditional fermented sauerkraut relies on the cabbage’s natural fermentation and a properly proportioned salt environment. NCHFP’s tested recipe does not call for simply filling sealed jars with boiling water and leaving them at room temperature. (Cnpaad)
If the goal is shelf-stable canned sauerkraut, that’s a different process: NCHFP gives specific boiling-water-canning times after fermentation, including 15 minutes for hot-packed quarts or 25 minutes for raw-packed quarts at 0–1,000 feet, with longer times at higher elevations. (Cnpaad)
🥬 Homemade Sauerkraut Is Worth the Wait
There’s something satisfying about turning an inexpensive head of cabbage into a tangy homemade food with just salt and time.
The process is simple:
Shred → Salt → Massage → Pack → Keep submerged → Ferment → Refrigerate.
And after several weeks, you have homemade sauerkraut ready for sausages, sandwiches, burgers, potatoes, Reuben-style sandwiches, or simply eating straight from the jar.
🥬 The Golden Rule
Keep the cabbage under the brine and use the correct amount of salt.
Those two details are much more important than trying to speed up the process.
Once you get the hang of it, you may find yourself buying cabbage just so you can make another batch. 😋🥬
