Step 1: Prepare Your Work Area
Concrete projects can get messy.
Choose a flat outdoor workspace such as:
- Patio
- Driveway
- Workbench
- Plywood sheet
Cover surfaces if desired for easier cleanup.
Wear gloves to protect your hands from the cement mixture.
Step 2: Mix the Concrete
Follow the instructions on your concrete mix.
The consistency should resemble thick pancake batter.
Avoid making it:
- Too watery
- Too dry
A smooth mixture produces stronger finished spheres.
Mix thoroughly to eliminate lumps.
Step 3: Stretch the Balloons
Before filling, gently stretch each balloon.
This helps:
- Prevent tearing
- Improve flexibility
- Allow easier filling
Large water balloons work best because they create substantial garden ornaments.
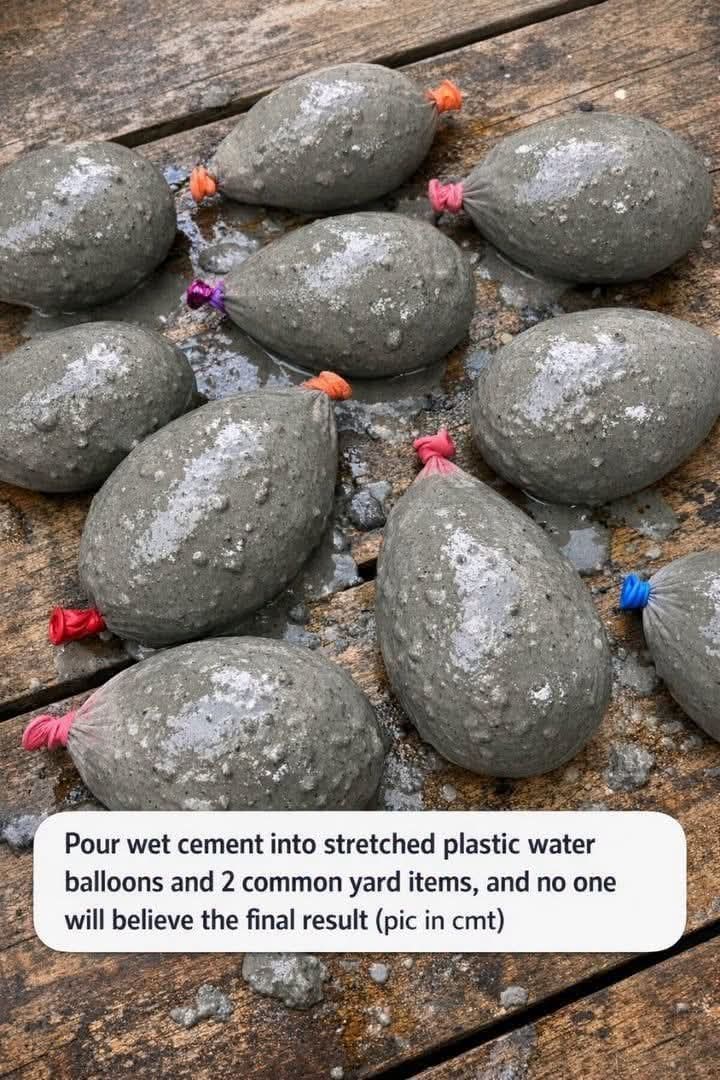
Step 4: Fill the Balloons
Carefully funnel the wet concrete into each balloon.
This is often easiest with:
- A funnel
- A plastic bottle with the bottom removed
- A helper holding the balloon open
Fill to your desired size.
Different sizes create a more natural-looking display later.
Step 5: Tie the Balloons Securely
Once filled, tie each balloon tightly.
Ensure there are no leaks.
The balloon should feel firm but not overly stretched.
Overfilling increases the risk of bursting.
Step 6: Shape the Spheres
Place the filled balloons on a flat surface.
Gently rotate them to help create uniform round shapes.
Don’t worry if they aren’t perfectly symmetrical.
Slight imperfections often make the finished pieces look more natural.
Step 7: Allow Initial Curing
Leave the balloons undisturbed for 24–48 hours.
Keep them in:
- Shade
- Moderate temperatures
- Dry conditions
During this stage, the concrete begins hardening inside the balloon mold.
Patience is important here.
Step 8: Mist With Water
Concrete cures best when it doesn’t dry too quickly.
Lightly mist the balloons with water once or twice daily.
This helps:
- Reduce cracking
- Improve strength
- Promote even curing
Professional concrete workers often use similar methods.
Step 9: Remove the Balloons
After several days, the concrete should feel solid.
Carefully cut or peel away the balloon.
As the rubber comes off, you’ll reveal the concrete globe underneath.
This is the most exciting part of the project.
Each sphere develops its own unique texture and character.
Step 10: Smooth Any Rough Areas
Use sandpaper or a concrete rubbing stone to soften rough spots if desired.
You can leave the surface natural for a rustic stone appearance or smooth it for a more modern look.
Both styles work beautifully in garden settings.
Step 11: Seal the Concrete (Optional)
Although not required, applying an outdoor concrete sealer offers additional protection.
Benefits include:
- Improved weather resistance
- Reduced staining
- Enhanced durability
A clear matte sealer preserves the natural stone appearance.
Step 12: Create Your Garden Display
Now comes the fun part.
Arrange the finished globes among:
- Flower beds
- Mulch
- Decorative gravel
- Ornamental grasses
- Garden pathways
Grouping multiple spheres together often creates the most dramatic effect.
Creative Design Ideas
Modern Zen Garden
Place several concrete globes among black gravel and ornamental grasses.
The contrast creates a sophisticated contemporary look.
Cottage Garden Accent
Nestle the spheres between:
- Lavender
- Coneflowers
- Roses
- Hydrangeas
The concrete provides texture and balance among colorful blooms.
Dry Creek Bed Feature
Position globes among landscape rocks to mimic naturally weathered stones.
Visitors often assume they’re genuine stone formations.
Patio Sculpture Display
Arrange varying sizes near outdoor seating areas for a designer-inspired focal point.
Why Homeowners Love Concrete Garden Spheres
These decorative pieces offer several advantages over traditional garden ornaments.
Weather Resistant
Unlike many decorative items, concrete can withstand:
- Rain
- Heat
- Frost
- Wind
Low Maintenance
No painting, charging, or upkeep required.
Timeless Style
The neutral stone appearance works with virtually every landscape design.
Budget Friendly
What looks like expensive garden décor often costs only a few dollars to make.
Common Mistakes to Avoid
Many first-time DIYers encounter a few avoidable problems.
Avoid:
- Overwatering the concrete mix
- Using thin balloons
- Moving balloons too early
- Skipping curing time
- Removing balloons before concrete hardens
Taking your time results in stronger, more attractive garden ornaments.
The Stunning Final Reveal
Once placed among mulch, gravel, flowers, or landscape stones, these homemade concrete globes no longer resemble balloons at all. Instead, they look like professionally crafted garden sculptures that could easily sell for dozens of dollars each at upscale garden centers.
Their smooth rounded shapes create visual interest throughout the landscape, while the natural concrete texture blends beautifully with plants and outdoor materials.
Most visitors never guess they began as simple water balloons filled with cement.
Final Thoughts
This project proves that some of the most impressive garden décor starts with the simplest materials. A bag of concrete, a few water balloons, and common landscaping supplies are all it takes to create elegant garden spheres that look far more expensive than they really are.
Whether you’re updating a flower bed, enhancing a pathway, or adding artistic touches to your landscaping, these DIY concrete globes are an affordable way to achieve a high-end garden look. Once your neighbors see the finished result, don’t be surprised if they start making their own.
