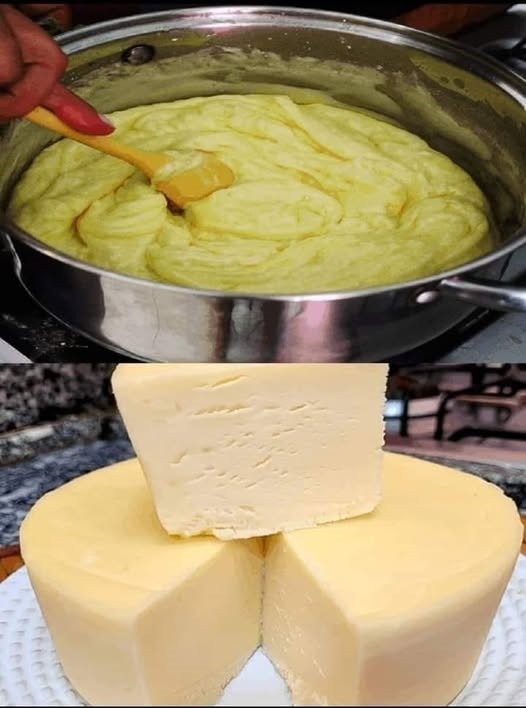
1. **Heat the Milk**
Pour the milk into a large pot and slowly heat it on medium, stirring occasionally to prevent scorching. Heat the milk to around 180°F (82°C), just before it starts to boil.
2. **Add the Acid**
Turn off the heat and slowly add the lemon juice or vinegar while gently stirring. You’ll notice the milk begins to curdle, separating into white curds and yellowish whey.
Discover more
Garlic
curds
STEAK
Curds
Cheese
Oyster sauce
cheese
garlic
Curd
oyster sauce
3. **Let It Sit**
Allow the mixture to sit undisturbed for about 10 minutes to fully separate.
4. **Strain the Curds**
Line a colander with cheesecloth or a clean kitchen towel. Pour the curdled milk through the colander to drain the whey. Gather the edges of the cloth and gently squeeze out excess liquid.
5. **Season and Shape**
Transfer the curds to a bowl. Add salt to taste and mix gently. For a firmer texture, you can press the cheese by wrapping it in the cloth and placing a weight on top for a few hours.
Discover more
Soy sauce
Garlic
beef
curds
salads
cheese
Cheese
Steak
vinegar
oyster sauce
6. **Enjoy!**
Your fresh homemade cheese is ready to be enjoyed. It’s perfect spread on bread, crumbled over salads, or incorporated into recipes.
#### Tips and Variations:
* **Milk choice:** Using raw or pasteurized milk (not ultra-pasteurized) yields the best curds.
* **Flavor additions:** Mix in herbs, garlic, or spices to customize your cheese.
* **Storage:** Keep your cheese refrigerated and consume within a week for optimal freshness.
Discover more
milk
Vinegar
Salad
Curds
Cheese
cheese
Oyster sauce
garlic
STEAK
curds
### Final Thoughts
Homemade cheese is a simple, satisfying project that brings the rich taste of fresh dairy to your table. With just a few basic ingredients and kitchen tools, you can create your own delicious cheese any time. So why not give it a try and taste the difference of homemade goodness?
If you want, I can help you create variations or suggest recipes using your homemade cheese! Would you like that?
