Roses have long been admired for their beauty and fragrance, gracing gardens and homes with their stunning blooms. However, getting roses to produce an abundance of buds and flowers can be a challenge for many gardeners. The secret to a flourishing rose bush might just lie in the soil and what you mix into it.In this article, we will explore a simple yet effective homemade mixture that can be poured into the soil of your rose bushes to promote bud formation and enhance blooming. This natural solution is not only easy to make but also ensures that your roses receive the essential nutrients they need to thrive.1. Why a Single Homemade Mixture Can Transform Rose Bud ProductionRoses, like any other flowering plants, require a balanced supply of nutrients to produce healthy buds and blooms. While commercial fertilizers are available, a homemade mixture offers a cost-effective and environmentally friendly alternative. The right combination of ingredients in this mixture can supply the necessary nutrients and minerals to the soil, improving the overall health of the rose bush and stimulating bud production.Specifically, this mixture provides a tailored blend of nutrients such as phosphorus, potassium, and trace minerals that roses need in abundance during their blooming phase. By applying this homemade solution, you ensure that your rose bushes have the optimal conditions to set more buds and produce larger flowers.2. The Science Behind Bud-Setting: What Roses Need to Bloom HeavilyFor roses to set buds and bloom heavily, they require a consistent supply of specific nutrients. Phosphorus is crucial for root development and flower production, while potassium helps in overall plant health and disease resistance. Additionally, trace elements like magnesium and calcium play vital roles in the photosynthesis process and strengthening plant cell walls.Understanding the science behind these nutrient requirements allows gardeners to tailor their soil amendments to meet the specific needs of their roses. By providing a balanced nutrient profile, gardeners can encourage their rose bushes to produce a more substantial number of buds, leading to a more vibrant and abundant display of flowers.3. The Exact Homemade Mixture Recipe: Simple Ingredients, Big ResultsCreating this homemade mixture is straightforward and only requires a few key ingredients. To prepare the solution, you will need:- 1 cup of bone meal, which is rich in phosphorus- 1 cup of wood ash, which supplies potassium- 1 tablespoon of Epsom salt, for magnesium- 1 gallon of waterTo make the mixture, combine the dry ingredients in a container, then add the water slowly while stirring. Ensure all components are well-dissolved before using the mixture on your rose bushes.4. How Each Ingredient Boosts Bud Formation and Flower SizeEach ingredient in this homemade mixture plays a crucial role in enhancing bud formation and flower size. Bone meal is a great source of phosphorus, which is essential for flower production and root growth. This nutrient helps roses allocate their energy towards producing more buds.Wood ash provides potassium, which is vital for overall plant vigor and helps in the development of strong stems and healthy foliage. Epsom salt provides magnesium, an essential component of chlorophyll, which is necessary for photosynthesis. This process fuels the plant’s energy production, leading to healthier growth and larger, more vibrant flowers.5. Step-By-Step: How to Mix and Prepare the Solution at HomeBegin by measuring out 1 cup of bone meal and 1 cup of wood ash, and place them into a large mixing container. Add 1 tablespoon of Epsom salt to the dry mixture.Gradually pour 1 gallon of water into the container, stirring continuously to ensure all ingredients dissolve thoroughly. Once mixed, allow the solution to sit for a few hours to fully integrate before applying it to your rose bushes.6. When and How Often to Pour the Mixture Into Rose Bush SoilThe best time to apply this homemade mixture is during the early growing season, just as the roses are beginning to leaf out. This timing ensures that the plants receive the necessary nutrients right before they enter their bud-setting phase.Apply the mixture every 4 to 6 weeks throughout the growing season, depending on the health and performance of your roses. Regular applications will keep the nutrient levels consistent, promoting continuous bud formation and bloom development.7. The Right Way to Apply the Mixture for Maximum Bud SetTo apply the mixture effectively, gently pour it around the base of each rose bush, ensuring that the solution soaks into the soil surrounding the root zone. Avoid pouring the mixture directly onto the plant stems or leaves, as this can cause damage.After applying the mixture, water the roses lightly to help the nutrients penetrate deeper into the soil, reaching the roots more effectively. This technique ensures that the roses absorb the maximum amount of nutrients, leading to increased bud set and flower production.8. Mistakes to Avoid So You Don’t Burn Roots or Stress PlantsWhile this homemade mixture is beneficial, it is essential to apply it correctly to avoid harming your rose bushes. One common mistake is using too much of the mixture, which can lead to nutrient burn and stress the plants. Always adhere to the recommended measurements and application frequency.Another mistake is applying the mixture during the hottest part of the day, which can cause the water in the solution to evaporate quickly, leaving salts behind that may harm the plants. Instead, apply the mixture in the early morning or late afternoon when temperatures are cooler.9. Visible Signs the Mixture Is Working on Your RosesAfter a few weeks of using the mixture, you should begin to notice visible signs of improvement in your rose bushes. Look for an increase in the number of buds forming on each stem, as well as larger, more vibrant blooms. The leaves may also appear greener and healthier, indicating that the plants are benefiting from the nutrients.Additionally, you may observe that your roses are more resistant to common diseases and pests, a testament to the enhanced plant vigor provided by the mixture.10. Safe Variations of the Mixture for Different Rose Types and ClimatesDifferent rose varieties and climates may require slight adjustments to the mixture. For example, if you are growing roses in a particularly alkaline soil, you may want to reduce the amount of wood ash to prevent raising the soil pH too much.In regions with high rainfall, you may need to apply the mixture more frequently, as nutrients can leach from the soil more quickly. Conversely, in dry climates, ensure that the soil is adequately moist before applying the mixture to prevent nutrient lockout.11. Expert Tips to Pair With the Mixture for Even More BloomsIn addition to using the homemade mixture, consider pairing it with other best practices to maximize rose blooms. Regularly deadhead spent flowers to encourage new bud formation. Prune your rose bushes in late winter or early spring to remove dead or weak stems, allowing the plant to focus its energy on producing new growth.Mulching around the base of the rose bushes can help retain soil moisture and suppress weeds, providing a better environment for root growth. Finally, ensure your roses receive at least six hours of sunlight each day, as light is crucial for photosynthesis and flower production.
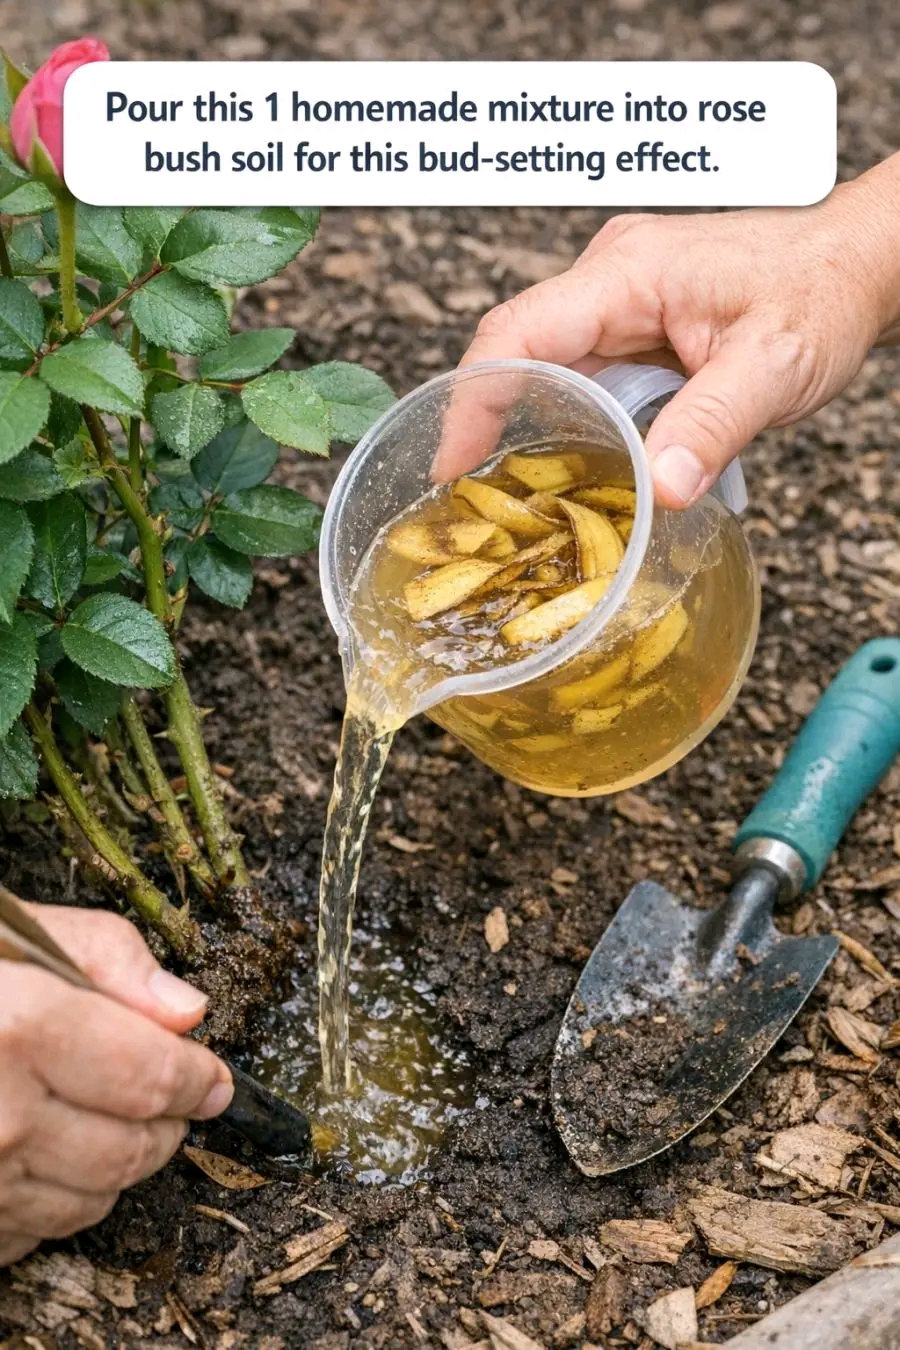
Pour this 1 homemade mixture into rose bush soil for this bud-setting effect
ADVERTISEMENT
