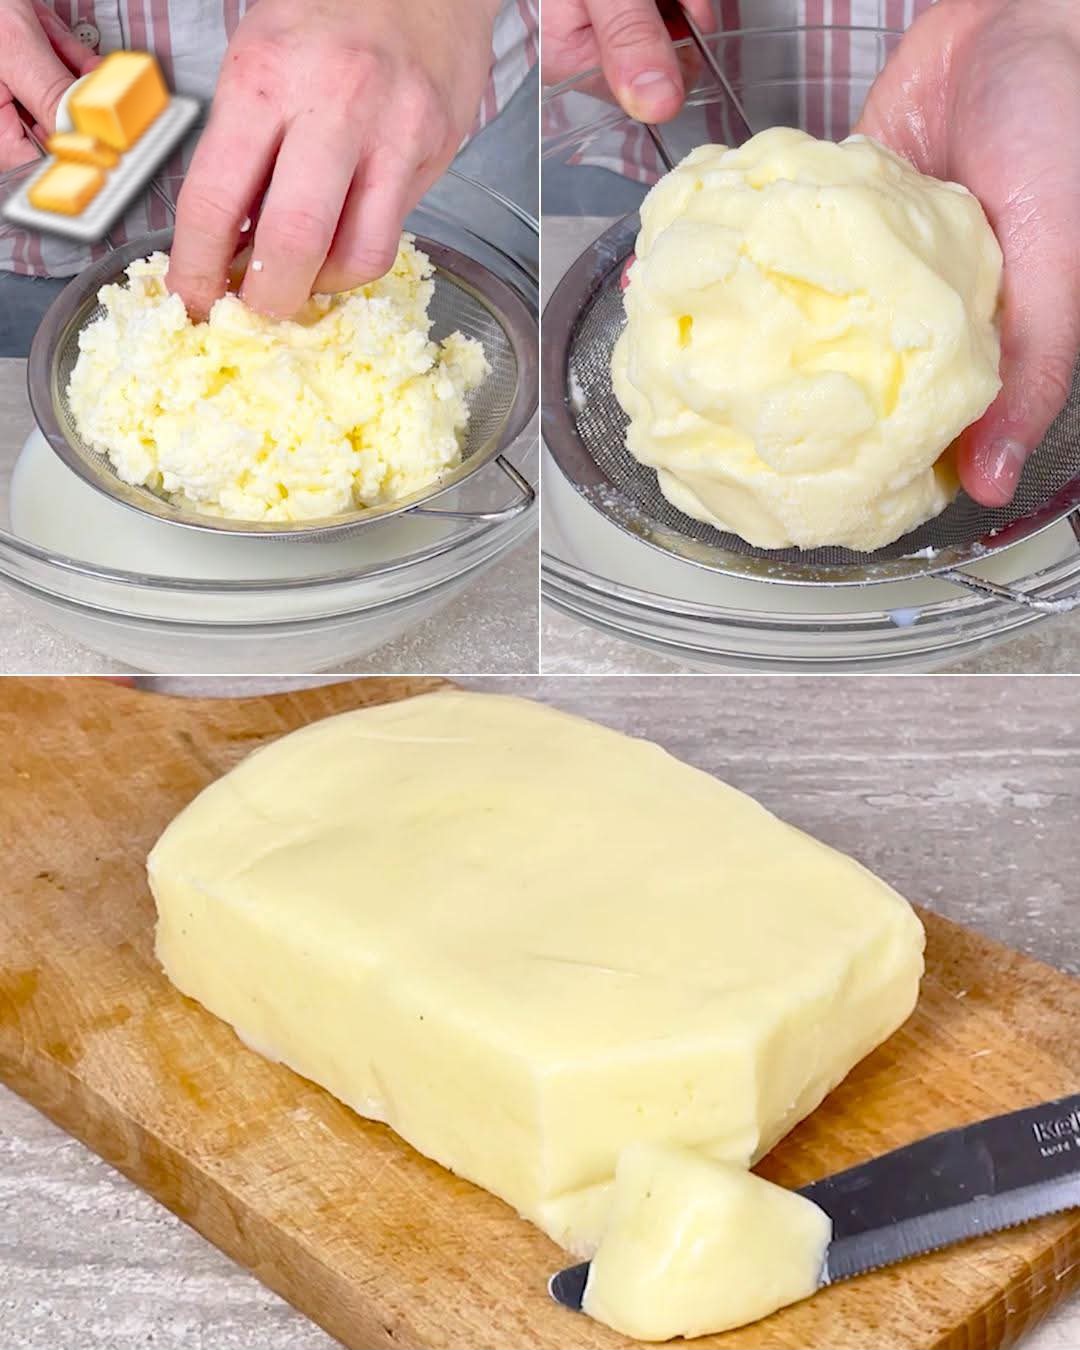
🧈 How to Make Fresh Butter at Home
Have you ever wondered how easy it would be to make your own butter?
You might be surprised to learn that homemade butter requires only one main ingredient: heavy cream.
With a little shaking, whipping, or mixing, that cream eventually separates into two things: rich golden butter and fresh buttermilk.
It’s an old-fashioned kitchen project that’s simple, satisfying, and a wonderful way to experience how one basic ingredient can be transformed into something completely different.
And the best part?
You don’t need a butter churn.
A clean jar with a tight-fitting lid works beautifully.
🧈 What You Need
Ingredients
- 2 cups heavy whipping cream
- ¼ teaspoon salt, optional
That’s it!
For unsalted butter, simply leave out the salt.
Equipment
- Large glass jar with a tight-fitting lid
- Fine-mesh strainer
- Bowl
- Wooden spoon or spatula
- Clean butter dish or airtight container
You can also make butter using a stand mixer or electric hand mixer, which is much faster than shaking a jar.
🥛 Step 1: Start With Heavy Cream
Pour 2 cups of heavy whipping cream into a clean jar.
Don’t fill the jar more than about halfway.
The cream needs room to move around as you shake it.
Secure the lid tightly.
🫙 Step 2: Start Shaking
Now comes the fun part!
Shake the jar vigorously.
At first, the cream will simply slosh around.
After several minutes, it will become thicker as the cream turns into whipped cream.
Keep going.
Eventually, you’ll notice the texture changing again.
Suddenly, little yellowish clumps will begin forming and a thin liquid will separate from them.
That’s the moment you’ve been waiting for.
You’ve made butter!
The whole process can take roughly 10–20 minutes by hand, depending on the temperature of the cream and how vigorously you shake.
It’s a great job to share with the kids!
🧈 Step 3: Separate the Butter From the Buttermilk
Once you have obvious butter clumps floating in liquid, pour everything through a fine-mesh strainer over a bowl.
The solid portion is your butter.
The liquid is fresh buttermilk.
Don’t throw it away!
🥞 Save That Buttermilk!
The leftover liquid can be useful in recipes such as:
- Pancakes
- Biscuits
- Waffles
- Cornbread
- Muffins
- Quick breads
It adds a pleasant tang and can help create tender baked goods.
💦 Step 4: Wash the Butter
This is an important step if you want your homemade butter to keep well.
Place the butter into a bowl and cover it with very cold water.
Use a wooden spoon or spatula to press and knead the butter gently.
The water will become cloudy as remaining buttermilk is released.
Pour off the cloudy water.
Add more cold water and continue gently pressing and rinsing until the water becomes much clearer.
The goal is to remove as much residual buttermilk as practical.
🧂 Step 5: Add Salt
If you want salted butter, add approximately:
¼ teaspoon salt per 2 cups of cream
You can adjust this to taste.
Work the salt into the butter using a wooden spoon or spatula.
Keep pressing and folding until evenly distributed.
For unsalted butter, simply skip this step.
👐 Step 6: Shape Your Butter
Gather the butter together and press out as much excess water as you can.
You can shape it into:
- A small log
- A block
- A ball
- Individual portions
Wrap it well or place it in a clean airtight container.
❄️ Step 7: Refrigerate
Homemade butter should be stored in the refrigerator.
A refrigerator should be maintained at 40°F (4.4°C) or below for safe food storage. (FSIS)
Because homemade butter is made from fresh dairy and doesn’t have the same controlled processing and packaging as commercial butter, it’s sensible to keep it cold and use it relatively promptly.
If you aren’t going to use it soon, freezing is another option.
🧊 Can You Freeze Homemade Butter?
Absolutely.
If you’ve made more butter than you can use, divide it into convenient portions.
Wrap each portion tightly and place it in a freezer-safe container or bag.
You can then take out only what you need.
Commercial butter is also among the foods USDA lists as safe during certain refrigeration emergencies, but that doesn’t mean homemade butter should be treated as shelf-stable. (FSIS)
When in doubt, keep homemade butter refrigerated or frozen.
🧈 Making Butter With a Mixer
Don’t feel like shaking a jar for 15 minutes?
Your mixer can do the work for you.
Pour the heavy cream into the bowl of a stand mixer fitted with the whisk attachment.
Start at low speed and gradually increase to medium-high.
The cream will first become whipped cream.
Keep mixing.
Eventually, the whipped cream will break.
You’ll see yellow butter clumps and liquid buttermilk separate.
Stop the mixer and strain off the liquid.
Then rinse and knead the butter with cold water just as described above.
This method is especially convenient when making a larger batch.
🧂 Homemade Flavored Butter
Once you’ve mastered basic butter, the possibilities are endless!
🧄 Garlic Herb Butter
Mix softened homemade butter with:
- Minced garlic
- Parsley
- Chives
- A pinch of salt
Perfect for bread, potatoes, vegetables, or grilled meats.
🍯 Honey Butter
Mix softened butter with honey and a pinch of salt.
It’s wonderful on:
- Toast
- Biscuits
- Pancakes
- Cornbread
🌿 Herb Butter
Try:
- Rosemary
- Thyme
- Parsley
- Chives
Shape the butter into a log, wrap it, and refrigerate.
Slice off pieces whenever you need them.
🍋 Lemon Herb Butter
Add a little lemon zest along with parsley and chives.
This is delicious melted over vegetables or fish.
🥖 What Can You Do With Homemade Butter?
Pretty much anything you’d normally do with butter!
Spread it on:
🥖 Fresh bread
🥞 Pancakes
🧇 Waffles
🌽 Corn on the cob
🥔 Baked potatoes
🥕 Steamed vegetables
🍪 Homemade cookies
Or melt it into your favorite recipes.
There’s something especially satisfying about spreading butter on homemade bread when you made the butter yourself, too.
💡 Why Does Cream Turn Into Butter?
Here’s the simple science behind it.
Cream contains tiny droplets of milk fat surrounded by membranes.
When you shake or whip the cream vigorously, those fat droplets collide and begin sticking together.
At first, you get whipped cream because air is incorporated into the mixture.
Keep going, and the fat structure eventually breaks apart.
The fat clumps together into butter while the remaining liquid separates out.
So essentially:
Heavy cream → whipped cream → butter + buttermilk
It’s a perfect little kitchen science experiment.
🧈 How Much Butter Does 2 Cups of Cream Make?
The exact amount depends on the cream’s fat content and how efficiently the butter is separated.
As a rough guide, 2 cups of heavy cream can produce around 8 ounces of butter, give or take.
You’ll also have some leftover liquid buttermilk.
Don’t be discouraged if your amount varies.
Cream brands differ in fat content, and some batches naturally produce more butter than others.
🌡️ A Few Tips for Better Homemade Butter
Use good-quality heavy cream
The flavor of your butter starts with the cream.
A fresh, flavorful cream will produce better-tasting butter.
Don’t overfill your jar
The cream needs room to move.
Half-full is a good rule when making butter by shaking.
Keep going after whipped cream forms
This is where many people stop.
Don’t!
Whipped cream is only one stage of the process.
Keep shaking until the butter separates.
Use very cold water for washing
Cold water helps keep the butter firm while you’re working with it.
Wash thoroughly
Removing as much remaining buttermilk as possible helps improve the butter’s keeping quality.
Add salt at the end
It’s much easier to control the salt level after the butter has formed.
♻️ Don’t Waste the Buttermilk
One of the nicest things about making butter at home is that you get two useful products from one ingredient.
You get:
Homemade butter 🧈
and
Buttermilk 🥛
That buttermilk can go straight into a batch of pancakes or biscuits.
It makes the process feel even more worthwhile.
⚠️ Homemade Butter Food-Safety Tips
Because you’re working with fresh dairy, cleanliness and refrigeration matter.
Start with fresh cream, clean equipment, and clean hands.
Keep the finished butter refrigerated at 40°F or below. (FSIS)
Don’t leave homemade butter sitting at room temperature for long periods. USDA advises keeping perishable foods out of the temperature “Danger Zone” of 40–140°F, where bacteria can multiply rapidly. (FSIS)
If the butter develops an unusual smell, appearance, or texture, it’s best to discard it rather than trying to rescue it. USDA’s general guidance is “When in doubt, throw it out.” (FSIS)
❤️ The Old-Fashioned Magic of Homemade Butter
There’s something wonderful about making butter yourself.
You start with a simple carton of cream.
You shake.
You shake some more.
You watch it become whipped cream.
Then suddenly…
Butter! 🧈
It’s a little bit messy, a little bit old-fashioned, and incredibly satisfying.
And you don’t need special equipment or a fancy kitchen.
Just cream, a jar, and a little patience.
🧈 Homemade Butter
Prep: 5 minutes
Churning/shaking: About 10–20 minutes
Rinsing and shaping: 10 minutes
Makes: Approximately 8 ounces, depending on cream
Ingredients
- 2 cups heavy whipping cream
- ¼ teaspoon salt, optional
The Method
Shake → Whip → Separate → Strain → Wash → Salt → Shape → Refrigerate
That’s it!
The next time you have some heavy cream in the refrigerator, give it a try.
You may never look at a carton of cream the same way again. 🥛➡️🧈❤️
