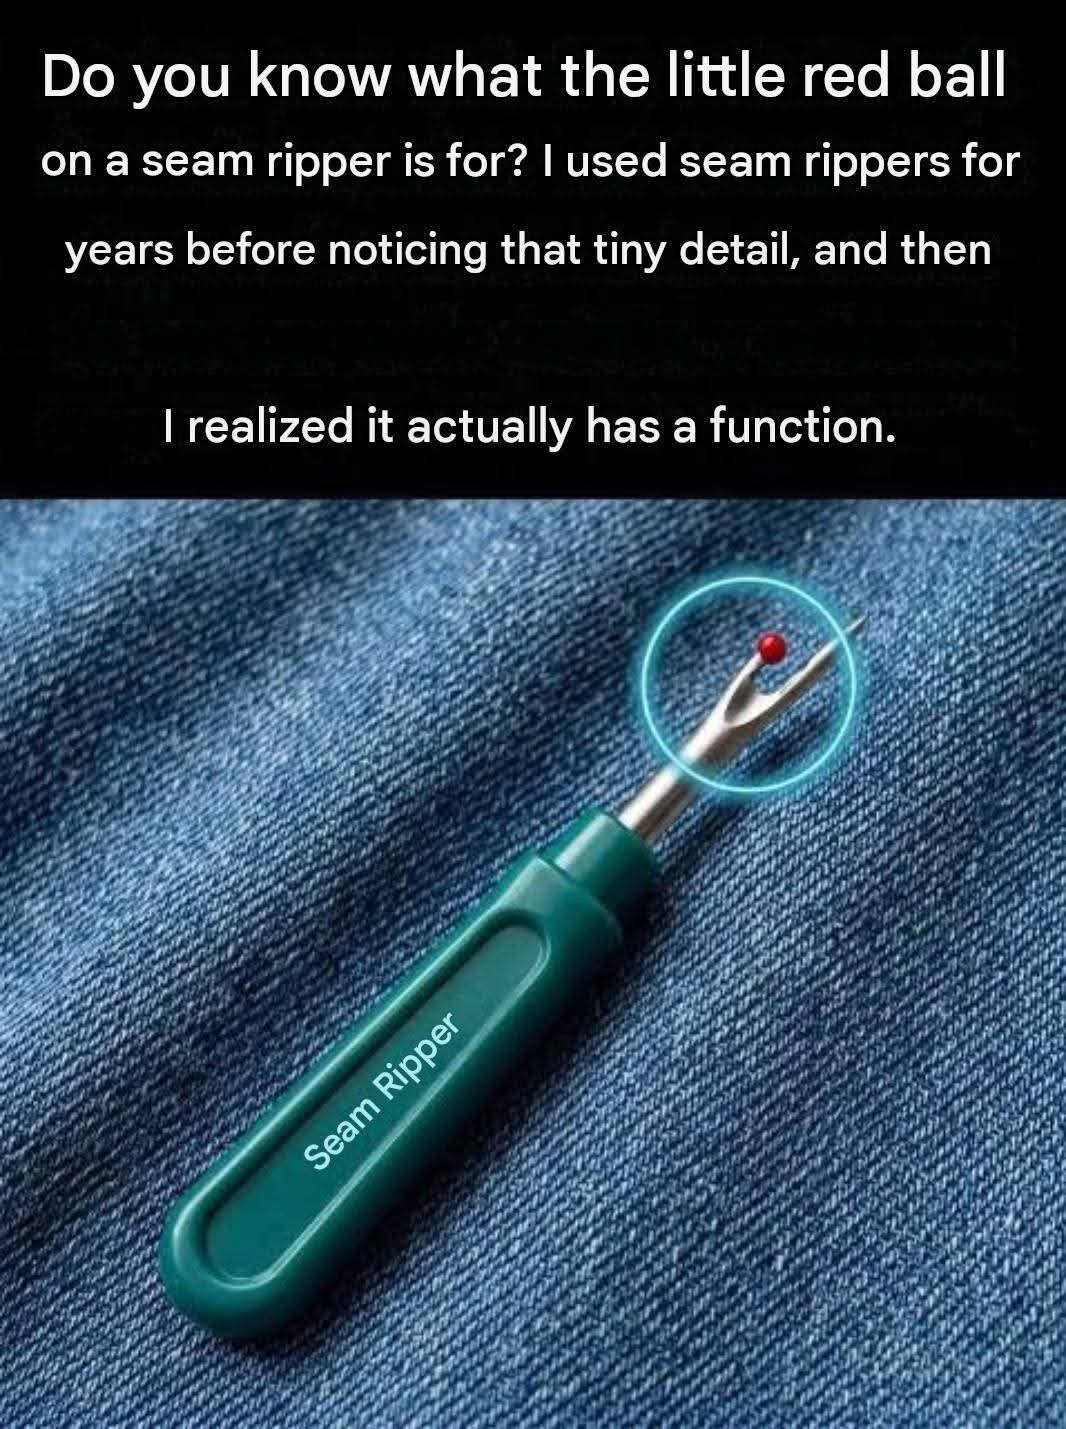
Generally, it consists of a handle and a forked metal tip with two ends:
A point is sharp and pointed.
The other one is longer and usually has a small protective ball at the end.
Between the two lies a curved edge.
That small edge is what cuts the thread.
The tool is especially useful when you need to undo:
A seam
A hem
Incorrect stitches
Basting stitches
Embroidery stitches
Sewing a zipper
A sewing section that needs to be redone
And, despite its name, the goal is not to “tear” the fabric
In reality, what it does is cut the thread while protecting the fabric.
How exactly does a seam ripper work?
Read more on the next page
ADVERTISEMENT How does a seam ripper really work?
Here’s the clever trick.
The seam ripper isn’t designed to require much force. Its shape allows you to place the cutting edge under a thread and cut it with a small movement.
The
pointed tip helps to get under or between individual stitches.
Fabrics and wools
The protective ball
The longest tip usually ends in a small rounded ball.
When used correctly, the rounded tip can glide over the fabric as the cutting edge approaches the thread . This helps reduce the risk of accidentally snagging the fabric with the sharp part.
The curved edge
The cutting edge is located between the two points.
Once the stitch is positioned against that edge, a gentle forward motion can cut the thread.
Fabrics and wools
That’s why you shouldn’t need to apply much force to open a seam.
If you’re using a lot of force, it’s usually worth stopping and repositioning the tool.
Why you shouldn’t just separate the seam by pulling on it.
This is one of the most common mistakes beginners make.
It can be tempting to grab both sides of a seam and pull.
Please don’t do it.
Pulling too hard can stretch the fabric, distort the seam line, or cause the threads to snag and pull out fibers from the fabric.
Explore Screens
A seam ripper gives you much more control.
Instead of fighting the garment, you simply remove the individual stitches that hold the fabric together.
Fabrics and wools
And once you get the hang of it, it’s surprisingly relaxing.
How to use a seam ripper correctly
. Ready?
Let’s go step by step, stitch by stitch.
Fabrics and wools
-
- Turn the garment inside out.
Whenever possible, turn the garment inside out before starting.
- Turn the garment inside out.
The back of the seam can make individual threads easier to see, depending on how it was sewn.
Place the section you are going to work on on a flat, well-lit surface.
Good lighting makes the job considerably easier!
- Identify the stitches you want to remove.
Before cutting anything, carefully observe the seam.
Decide exactly where you want the unpicking to begin and end.
This is especially important when you only want to open a small section of the seam. You don’t want to undo ten inches of seam when you only needed two.
- Slide the tip under the stitch.
Hold the seam ripper comfortably in your hand.
Use the pointed end to carefully insert it under a stitch.
There’s no need to force it.
Gently slide the tip under the thread until the stitch rests against the cutting edge.
- Cut the thread.
Once the stitch is properly positioned, make a small, controlled movement to cut the thread.
You should feel very little resistance.
That’s the wonderful thing about the seam ripper: it doesn’t require brute force.
If you’re having trouble cutting the stitch, change the position of the tool instead of pressing harder.
- Continue along the seam.
Move on to the next stitch and repeat the process.
In a long seam, it is not necessary to cut each stitch individually.
A useful method involves cutting several stitches at intervals, gently separating the seam, and removing any remaining loose threads.
The key word here is “gently”.
- Remove the cut threads.
Once enough stitches have been cut, carefully separate the layers of fabric.
Many of the remaining threads should come off easily.
Small thread scissors or tweezers can help remove the more stubborn pieces.
- Check the fabric
Before proceeding with the repair or alteration, examine the fabric carefully.
Search:
Loose threads,
stretched fibers,
small holes
, snags,
stitches you may have accidentally missed.
If everything looks okay, you can move on to the next step.
The most important rule when using a seam ripper.
Here’s the rule I wish all beginners knew:
Let the tool do the work.
The seam ripper is sharp.
You don’t need to press hard.
You don’t need to make aggressive sawing motions.
And of course, you don’t need to rush.
A smooth, controlled movement gives you much more precision and reduces the risk of accidentally cutting the fabric.
If the seam ripper doesn’t slide easily under the stitch, stop and reposition it.
How to avoid cutting the fabric
This is probably the biggest concern when learning to use a seam ripper.
After all, what’s worse than trying to remove a small stitch and accidentally making a hole in your favorite shirt?
Keep the fabric taut.
Don’t stretch it abruptly, but keep the area reasonably flat and supported.
This makes the stitches easier to see.
Work with good lighting.
Natural light is wonderful for sewing, but a powerful work lamp works great too.
Use the protective tip correctly.
Whenever possible, orient the seam ripper so that the rounded protective ball is between the cutting edge and the fabric as you slide it under the stitch.
The exact angle depends on the seam and the fabric, so don’t force the tool into an uncomfortable position.
Cut threads, not fabric.
Keep your attention on the thread you want to cut.
The goal is to make a small cut, not a long, drastic slash through the seam.
Do you have to cut all the stitches?
Not necessarily.
In a short seam, it may be easier to cut the stitches one by one.
On a longer seam, you can often cut stitches at intervals and then gently separate the seam so that the remaining threads are easier to remove.
However, delicate fabrics require special care.
If the fabric is fragile, elastic, loosely woven, or expensive, work more slowly and remove fewer stitches each time.
Try to cut several layers at once.
Separate the layers whenever possible.
Working in low light
can make it difficult to distinguish small dots on the fabric itself.
Explore Screens
Good lighting can make the work much easier.
Working in a hurry:
This is a sewing task where patience really pays off.
It’s better to remove a small spot each time than to accidentally cause a large hole.
Fabrics and wools
How to hold the seam ripper
There is no single correct way to hold it.
Hold it in the way that gives you the most control.
Many people hold it similarly to a pencil or a small craft tool, using their thumb and fingers to guide the tip. The important thing is that the grip feels relaxed.
You should be able to make small movements instead of large, abrupt ones.
How to choose a good seam ripper
If you’re buying your first seam ripper, you don’t need anything sophisticated.
Search:
A comfortable handle.
A sharp, clean cutting blade.
A soft protective ball.
An easy-to-control size.
A protective cap, if included.
A larger handle may be more comfortable if you have difficulty gripping very small sewing tools.
