🎄
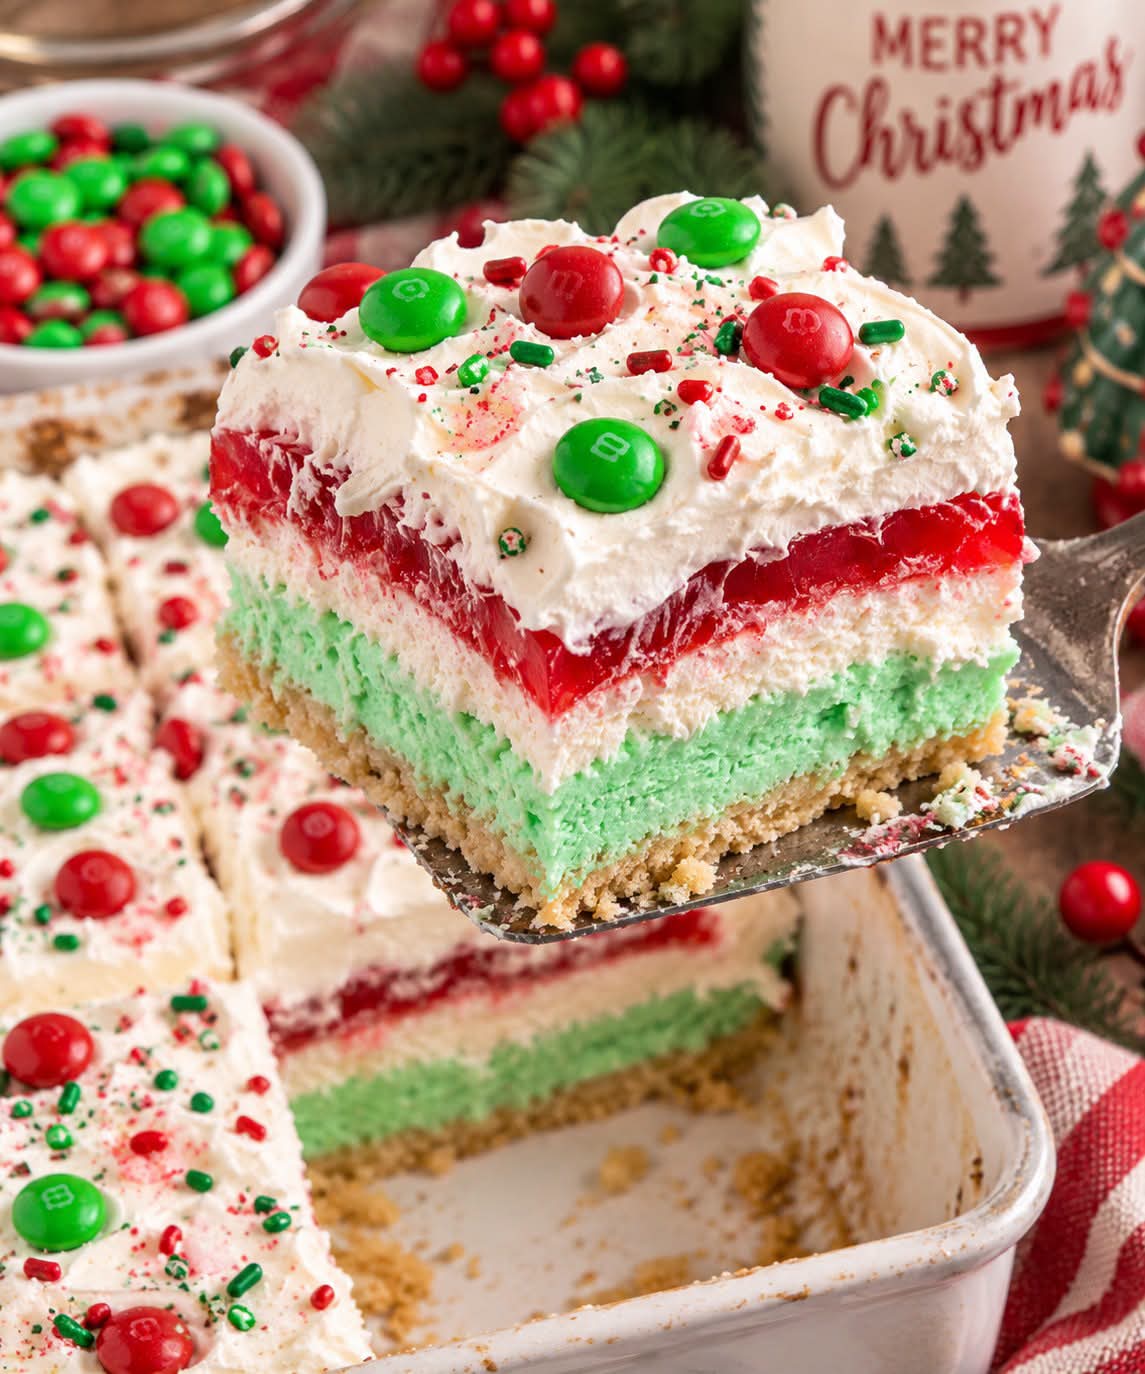
Creamy, festive, and completely irresistible, this No-Bake Christmas Lush Dessert is the perfect holiday treat when you want something impressive without turning on the oven. 🎅✨
With a buttery cookie crust, creamy cheesecake layer, festive red-and-green pudding, and fluffy whipped topping, every bite is sweet, smooth, crunchy, and delicious.
Best of all, you can make it ahead of time, making it perfect for Christmas dinners, holiday parties, cookie exchanges, and family gatherings.
🎄 Ingredients
For the Crust
- 36 Oreo cookies, or chocolate sandwich cookies
- 6 tablespoons unsalted butter, melted
For the Cream Cheese Layer
- 8 ounces cream cheese, softened
- ½ cup powdered sugar
- 1 teaspoon vanilla extract
- 1 cup whipped topping, thawed
For the Pudding Layer
- 1 package (3.4 ounces) instant vanilla pudding mix
- 3 cups cold milk
- Red food coloring
- Green food coloring
For the Topping
- 2 cups whipped topping, thawed
- Red and green Christmas sprinkles
- Mini Christmas candies, optional
- White chocolate curls or shavings, optional
🥄 Instructions
1. Make the Cookie Crust
Place the cookies in a food processor and pulse until they become fine crumbs.
Pour in the melted butter and pulse until the mixture resembles wet sand.
Press the cookie mixture firmly into the bottom of a 9×13-inch baking dish.
Use the bottom of a measuring cup or glass to create an even, compact layer.
Place the crust in the refrigerator while preparing the next layer.
2. Make the Cream Cheese Layer
Place the softened cream cheese in a mixing bowl.
Beat until smooth and creamy.
Add the powdered sugar and vanilla extract and mix until completely combined.
Gently fold in 1 cup of whipped topping until light and fluffy.
Spread the cream cheese mixture evenly over the chilled cookie crust.
Return the dish to the refrigerator.
3. Make the Christmas Pudding
In a large bowl, whisk the instant vanilla pudding mix with the cold milk for about 2 minutes, or until the mixture begins to thicken.
Divide the pudding evenly between two bowls.
Leave one bowl white.
Add a few drops of red food coloring to the second bowl and stir until you reach your desired shade.
For a red-and-green version, divide the pudding into three portions and color one red, one green, and leave one white.
4. Create the Festive Layer
Spoon or gently spread the colored pudding over the cream cheese layer.
You can alternate spoonfuls of red, green, and white pudding for a pretty Christmas effect.
Spread gently so you don’t disturb the cream cheese layer underneath.
5. Add the Whipped Topping
Spread the remaining whipped topping evenly over the pudding layer.
Smooth the top with a spatula.
6. Decorate
Now comes the fun part! 🎄
Sprinkle the top with red and green Christmas sprinkles.
Add mini Christmas candies, crushed cookies, white chocolate curls, or festive sugar decorations if desired.
For an especially pretty presentation, arrange the decorations in stripes or a Christmas-tree pattern.
7. Chill
Cover the dish and refrigerate for at least 4 hours, preferably overnight.
This gives the layers time to set and makes the dessert much easier to slice.
🎅 How to Serve
When you’re ready to serve, cut the lush into squares using a sharp knife.
For cleaner slices, wipe the knife between cuts.
Serve cold and add a little extra whipped topping or sprinkles just before serving.
⭐ Tips for the Best Christmas Lush
Soften the cream cheese first. Room-temperature cream cheese blends much more smoothly.
Use instant pudding. Cook-and-serve pudding won’t work the same way in this no-bake recipe.
Don’t rush the chilling time. At least 4 hours gives the layers time to firm up.
Make it ahead. This is an excellent make-ahead Christmas dessert. Prepare it the night before and decorate before serving.
Press the crust firmly. A firmly packed crust will hold together much better when you cut the dessert.
❤️ Easy Variations
Christmas Vanilla Lush
Use a Golden Oreo or vanilla sandwich-cookie crust instead of chocolate.
Peppermint Christmas Lush
Add ¼ teaspoon peppermint extract to the cream cheese layer and decorate with crushed candy canes.
Chocolate Mint Lush
Use chocolate pudding and add a small amount of peppermint extract to the cream cheese layer.
Strawberry Christmas Lush
Add a thin layer of strawberry pie filling between the cream cheese and pudding layers.
White Chocolate Christmas Lush
Add finely chopped white chocolate to the cream cheese layer and finish with white chocolate curls.
🧊 Storage
Cover the dessert tightly and refrigerate.
It is best enjoyed within 3–4 days.
Because this dessert contains dairy, don’t leave it sitting at room temperature for extended periods. Keep it refrigerated until you’re ready to serve.
🎄 Recipe Card
Prep Time: 25 minutes
Chill Time: 4 hours
Total Time: 4 hours 25 minutes
Servings: 12–16
Dish: 9×13-inch pan
Method: No-Bake
Ingredients
Crust
- 36 Oreo cookies
- 6 tablespoons melted butter
Cream Cheese Layer
- 8 ounces cream cheese
- ½ cup powdered sugar
- 1 teaspoon vanilla
- 1 cup whipped topping
Pudding Layer
- 3.4-ounce package instant vanilla pudding
- 3 cups cold milk
- Red and green food coloring
Topping
- 2 cups whipped topping
- Christmas sprinkles and candies
Directions
- Crush cookies and mix with melted butter.
- Press firmly into a 9×13-inch dish and chill.
- Beat cream cheese, powdered sugar, and vanilla until smooth.
- Fold in whipped topping and spread over the crust.
- Whisk pudding with cold milk until thick.
- Divide and color the pudding red, green, and/or leave white.
- Spread the pudding over the cream cheese layer.
- Top with whipped topping.
- Decorate with Christmas sprinkles and candies.
- Refrigerate for at least 4 hours or overnight.
- Slice, serve, and enjoy!
🎄 The Perfect Make-Ahead Christmas Dessert
This No-Bake Christmas Lush has everything you want in a holiday dessert: a crunchy cookie crust, creamy cheesecake layer, sweet pudding, fluffy topping, and plenty of Christmas color.
And because there’s no oven required, it’s especially handy when your oven is already working overtime on the holiday meal.
Make it the night before, let it chill overnight, and you’ll have a beautiful Christmas dessert ready to go when your guests arrive. 🎅🎄❤️
Save this recipe—you’ll definitely want it when Christmas rolls around! ✨
