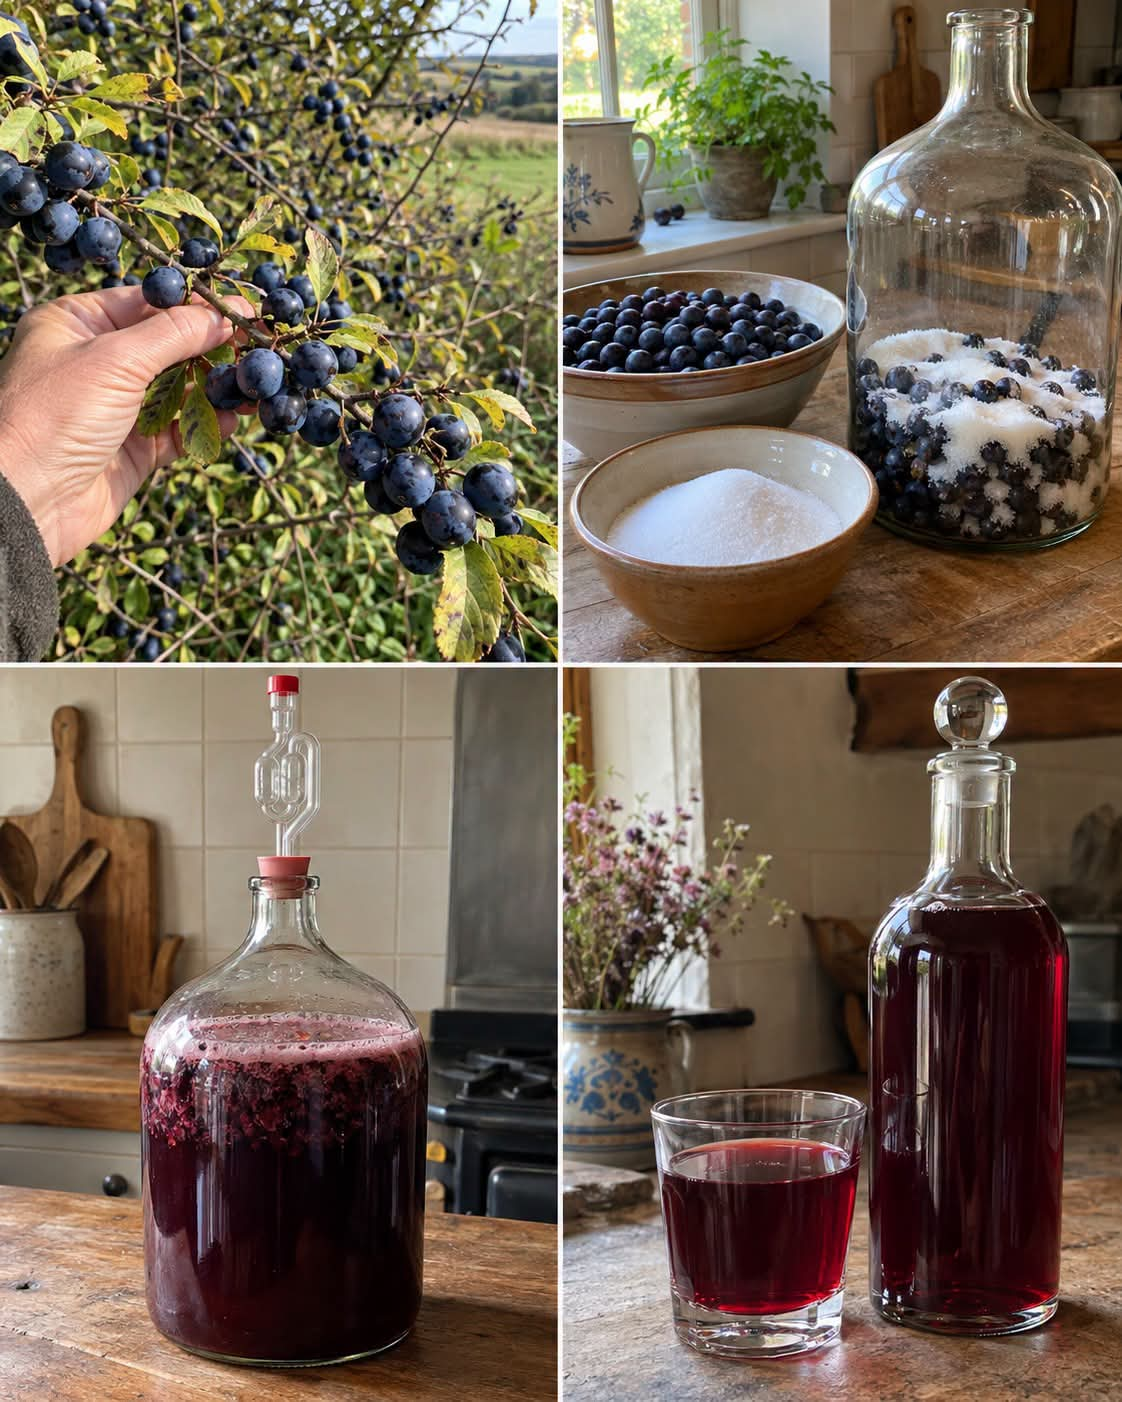
Those tiny blue-black fruits hanging from thorny blackthorn bushes in fall may not look particularly inviting. Bite into a fresh sloe and you’ll immediately understand why they’re rarely eaten straight from the bush: they’re intensely tart, dry, and mouth-puckeringly astringent.
But that doesn’t mean they aren’t worth harvesting.
Sloes (Prunus spinosa) are one of the classic wild fruits for homemade preserves and drinks. Their strong acidity, dark skins, tannins, and complex fruit flavor make them particularly well suited to country-style wine.
With sugar, wine yeast, careful fermentation, and plenty of patience, those harsh little fruits can become a beautifully colored wine with deep berry and stone-fruit character.
And patience really is important.
Sloe wine can taste quite aggressive when young. After several months of maturation, however, the sharp edges can soften considerably and the wine can become smoother, rounder, and far more complex.
Here’s a complete small-batch method.
What Are Sloe Berries?
Sloes are the fruits of blackthorn (Prunus spinosa), a thorny shrub native to Europe and parts of western Asia and widely naturalized elsewhere.
The fruits resemble very small dark plums.
When ripe, they typically have:
- Blue-black or deep purple skin
- A pale waxy bloom
- Greenish-yellow flesh
- One relatively large stone
- Very tart flavor
- Strong astringency
That astringency comes partly from tannins.
Fresh sloes can make your mouth feel dry almost immediately, but in winemaking those tannins can contribute structure and complexity.
When Should You Pick Sloes for Wine?
Sloes generally ripen in fall.
Look for berries that have developed their characteristic deep blue-black color and come away from the branch reasonably easily.
Traditionally, people often waited until after the first frost to gather sloes.
There’s some practical logic behind this tradition: freezing can soften the fruit and help break down its structure.
But you don’t actually need to wait for natural frost.
If the berries are fully ripe, you can harvest them and freeze them at home.
In fact, this can be preferable because waiting too long may mean competing with birds, wildlife, deteriorating weather, or overripe fruit.
The Freezer Trick
Freezing sloes before making wine is extremely useful.
After washing and sorting them, freeze the berries for at least overnight, although several days is perfectly fine.
Freezing causes ice crystals to form inside the fruit and damage some of the cellular structure.
After thawing, the berries become softer and release:
- Juice
- Color
- Flavor
more readily.
This also recreates some of the effect traditionally associated with harvesting after frost.
Important: Don’t Break the Stones
Sloes belong to the genus Prunus, the same broad group as plums, cherries, peaches, and almonds.
Each fruit contains a hard stone.
You want to break the fruit’s skin—not smash or grind the stones.
The kernels inside Prunus stones contain cyanogenic compounds. Leaving intact stones with the fruit during a traditional fermentation is very different from deliberately crushing or grinding the kernels.
So when preparing sloes:
Pierce, freeze, lightly crush, or mash the flesh—but don’t pulverize the stones.
Homemade Sloe Berry Wine Recipe
This recipe is designed to produce approximately 1 gallon (3.8 liters) of finished country wine, although the actual bottled amount will be somewhat lower after sediment and fruit solids are removed.
Ingredients
- 4 lb (1.8 kg) ripe sloes
- 2½–3 lb (1.1–1.35 kg) granulated sugar
- Enough water to make approximately 1 gallon (3.8 liters) of must
- 1 packet wine yeast, suitable for fruit or red wine
- 1 teaspoon yeast nutrient, or the amount recommended by the manufacturer
- 1 teaspoon pectic enzyme, or according to package directions
- Optional acid adjustment, depending on the fruit and measured acidity
Optional
- ½–1 lb (225–450 g) blackberries for a softer berry character
- A small quantity of grape concentrate for additional body
- A small amount of tannin only if measurements/tasting suggest it is needed
Sloes already contain substantial tannin, so don’t automatically add extra tannin.
Equipment You’ll Need
Home wine doesn’t require industrial equipment, but a few proper tools make the process far safer and more predictable.
You’ll need:
- Food-grade primary fermenter
- Large saucepan
- Fine straining bag or muslin bag
- 1-gallon demijohn or carboy
- Airlock and bung
- Siphon
- Hydrometer
- Sanitizer suitable for winemaking
- Funnel
- Wine bottles
- Appropriate closures
A hydrometer is especially useful.
If you intend to make wine more than once, it’s one of the best inexpensive pieces of equipment you can buy.
Step 1: Sort the Sloes
Spread the fruit out and inspect it carefully.
Discard:
- Moldy fruit
- Rotten berries
- Unripe green fruit
- Leaves
- Twigs
- Insects
- Heavily damaged fruit
A little wrinkling isn’t necessarily a problem, especially after cold weather, but you want sound fruit rather than decomposing fruit.
Step 2: Wash the Fruit
Rinse the sloes thoroughly under cool water.
Drain well.
There’s no need to scrub away every trace of the natural pale bloom on the skins.
The important thing is removing dirt and debris.
Step 3: Freeze the Sloes
Place the cleaned fruit in freezer-safe bags and freeze.
After they’re completely frozen, allow them to thaw.
You’ll notice that the skins become softer and often split.
That’s exactly what you want.
Some winemakers repeat the freeze-thaw cycle once more to break down the fruit further.
It’s optional, but useful.
Step 4: Lightly Crush the Fruit
Place the thawed sloes in your sanitized primary fermenter or a sanitized straining bag inside the fermenter.
Using a sanitized potato masher or similar tool, gently crush the fruit.
Again:
Don’t smash the stones.
You’re simply opening the skins and exposing the flesh.
Step 5: Prepare the Sugar Syrup
Heat part of your water in a saucepan.
Add the sugar and stir until completely dissolved.
You don’t need to aggressively boil sugar for a long period.
Once dissolved, pour the hot syrup over the prepared fruit.
Add additional water as necessary.
The hot liquid helps extract color and flavor from the sloes.
Allow the mixture to cool completely before adding yeast.
How Much Sugar Should You Use?
This is where a hydrometer becomes valuable.
Recipes often give a fixed amount of sugar, but fruit varies.
Two batches of sloes can contain different amounts of natural sugar and water.
Rather than assuming that adding 3 pounds of sugar automatically creates the perfect wine, measure the specific gravityof your must.
For many table-style fruit wines, an original gravity somewhere around 1.085–1.100 can be a reasonable target, depending on the desired finished strength and style.
For example, a must starting around 1.090 and fermenting close to 1.000 would theoretically produce roughly 12% ABV.
The actual result depends on the final gravity.
Step 6: Let the Must Cool
Never add yeast directly to very hot liquid.
High temperatures can kill it.
Allow the must to cool into the appropriate fermentation range for your chosen yeast.
Check the yeast manufacturer’s recommendations because different strains prefer different temperatures.
Step 7: Add Pectic Enzyme
Sloes contain pectin.
Pectic enzyme helps break down that pectin and can:
- Improve juice extraction
- Release more color
- Help the wine clear
- Reduce persistent pectin haze
Add it once the must has cooled, following the manufacturer’s dosage.
Step 8: Consider the Acidity Before Adding More
Many generic fruit-wine recipes automatically tell you to add lemon juice or citric acid.
With sloes, that’s not necessarily a good idea.
Sloes are naturally very tart.
Adding a large amount of acid without tasting or measuring the must can create an unnecessarily sharp wine.
If you have the equipment, measure pH and titratable acidity.
If you don’t, it’s safer to be conservative rather than automatically dumping lemon juice into an already acidic fruit wine.
Acidity can be adjusted later if necessary.
Step 9: Add Yeast Nutrient
Once the must is cool, add yeast nutrient according to the manufacturer’s directions.
Fruit alone may not provide an ideal nutrient balance for wine yeast.
A proper nutrient can support a cleaner, healthier fermentation.
More isn’t necessarily better.
Use the recommended amount.
Step 10: Add the Wine Yeast
Choose a wine yeast suitable for fruit wine.
Good options include strains commonly used for:
- Berry wines
- Red wines
- Country wines
Some yeast strains emphasize fruit character.
Others ferment very aggressively and produce a very dry wine.
Avoid ordinary baking yeast if your goal is predictable, high-quality wine.
Sprinkle or rehydrate the yeast according to the manufacturer’s instructions.
Step 11: Begin Primary Fermentation
Cover the primary fermenter appropriately and keep it at a stable temperature within the yeast’s recommended range.
Fermentation should become noticeable within roughly 12–48 hours.
You may see:
- Foam
- Bubbles
- Fruit rising
- A strong fruity aroma
- Increased activity at the surface
This is normal.
Step 12: Manage the Fruit Cap
As fermentation becomes active, fruit solids may float to the surface.
This layer is often called the cap.
If exposed fruit remains dry for long periods, it can become a potential location for spoilage organisms.
Using sanitized equipment, gently push the fruit back into the liquid once or twice daily during active primary fermentation.
Don’t aggressively beat air into the mixture.
Simply keep the fruit wet and fermentation progressing evenly.
Step 13: Check the Specific Gravity
Don’t judge fermentation entirely by bubbles.
Take hydrometer readings.
Your original reading tells you approximately how much fermentable sugar was present at the beginning.
As fermentation progresses, the reading falls.
This allows you to see what the yeast is actually doing rather than relying on visual clues.
Step 14: Remove the Sloes
After roughly 5–7 days of active fermentation, or when fermentation has progressed appropriately, remove the fruit.
If you’ve used a straining bag, lift it carefully and allow the liquid to drain.
Don’t crush the stones while squeezing.
Gentle pressure is enough.
Discard the spent fruit and stones.
next page 2
