- 🎃 Halloween Pumpkin Vomit Veggie Platter with Creamy Ranch DipThis spooky Halloween appetizer features a carved pumpkin that looks like it’s vomiting creamy ranch dip onto a bed of fresh vegetables! It’s a fun, festive centerpiece for Halloween parties, family gatherings, and autumn celebrations.The platter includes baby carrots, cherry tomatoes, broccoli, cauliflower, celery, cucumber, kale, and a thick, creamy herb dip spilling from the pumpkin’s mouth.Here is the complete recipe, including the ingredients, preparation instructions, dip recipe, and presentation tips.🥕 Recipe Overview
- Preparation time: 30–40 minutesCooking time: NoneTotal time: Approximately 40 minutesServings: 12–16 peopleDifficulty: EasyBest for: Halloween parties, fall gatherings, and spooky buffets
- 1 medium-large pumpkin, approximately 3–5 kg (6–11 lb)1 small, sharp knife for carving1 large serving tray or platterPaper towels for drying the vegetables
- 1 cup (240 g) mayonnaise1 cup (240 g) sour cream½ cup (120 ml) buttermilk, added gradually1 teaspoon garlic powder1 teaspoon onion powder1 teaspoon dried dill1 teaspoon dried parsley½ teaspoon dried chives, optional½ teaspoon salt, or to taste¼ teaspoon ground black pepper1–2 teaspoons fresh lemon juice1 teaspoon Dijon mustard, optional
- Wash the outside of the pumpkin thoroughly and dry it.Place it on a stable cutting board.Carefully cut a lid around the stem, angling the knife inward so the lid will not fall through.Remove the lid.Scoop out all the seeds and stringy pulp using a sturdy spoon.Scrape the inside until it is reasonably clean.Wipe the interior dry with paper towels.
- Turn the pumpkin so its flattest side faces forward.Draw two triangular eyes with a washable marker.Draw a large, curved, open mouth below the eyes.Carefully cut out the eyes.Cut out the mouth, making the opening wide enough for the dip to flow through.Remove the cut pieces and clean away any loose pumpkin flesh.Place the pumpkin upright on the center of your serving tray.
- Add the mayonnaise and sour cream to a medium mixing bowl.Whisk until smooth and creamy.Add the garlic powder, onion powder, dried dill, parsley, chives, salt, and black pepper.Stir in the lemon juice and Dijon mustard, if using.Gradually add the buttermilk, mixing after each addition.Stop adding buttermilk when the dip reaches your preferred consistency.
- Taste and adjust the seasoning as needed.Cover and refrigerate for at least 30 minutes to allow the herbs and seasonings to develop their flavor.
- Cut the broccoli into bite-sized florets.Separate the cauliflower into small florets.Dry both thoroughly.
- Remove the leaves and trim the ends.Cut the stalks into sticks approximately 8–10 cm (3–4 inches) long.
- Wash the cucumbers.Cut them into thick rounds or diagonal slices.
- Wash the tomatoes.Remove any damaged ones.Dry them thoroughly.
- Rinse the carrots.Pat them dry.
- Bottom: Pile the baby carrots in a generous crescent across the front of the tray.Left side: Arrange broccoli florets and cauliflower around the pumpkin.Right side: Place celery sticks and cucumber slices in neat rows.Around the edges: Fill gaps with cherry tomatoes.Behind the pumpkin: Add kale or curly lettuce to create a leafy backdrop.
- Spoon some of the chilled dip into a small bowl or piping bag.
- If using a bowl, position it just inside the pumpkin’s mouth so the rim is hidden from the front.
- Alternatively, place a small mound of dip immediately outside the mouth.
- Add more dip gradually, allowing it to spread forward onto the platter.
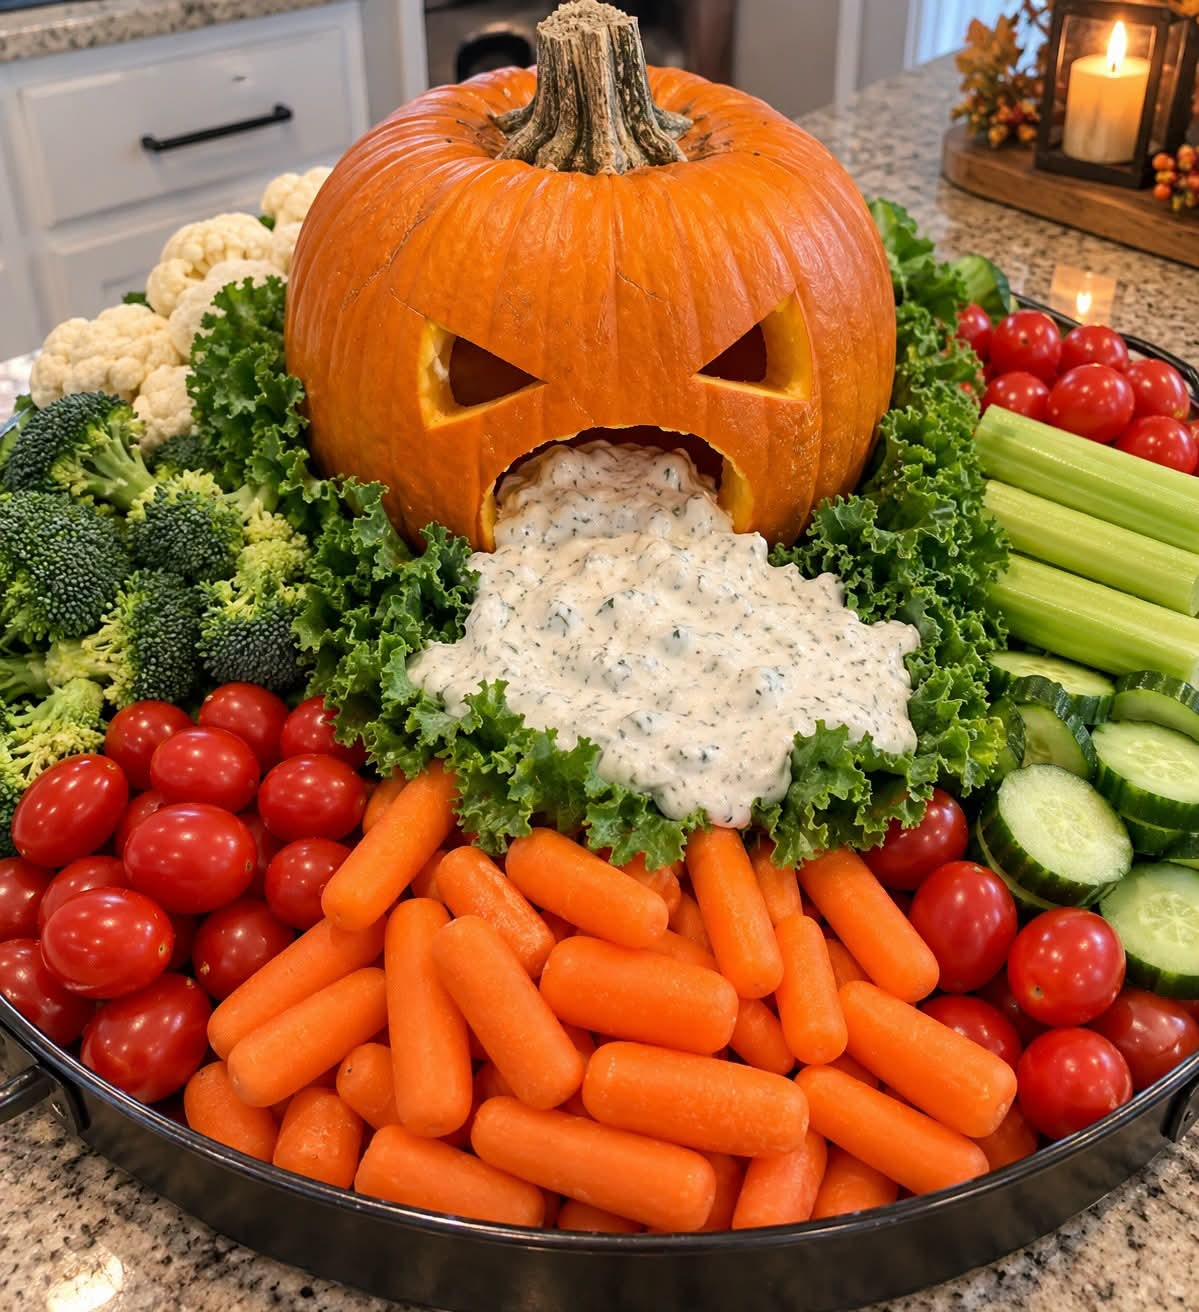
Halloween Pumpkin Vomit Veggie Platter with Creamy Ranch Dip
ADVERTISEMENT
