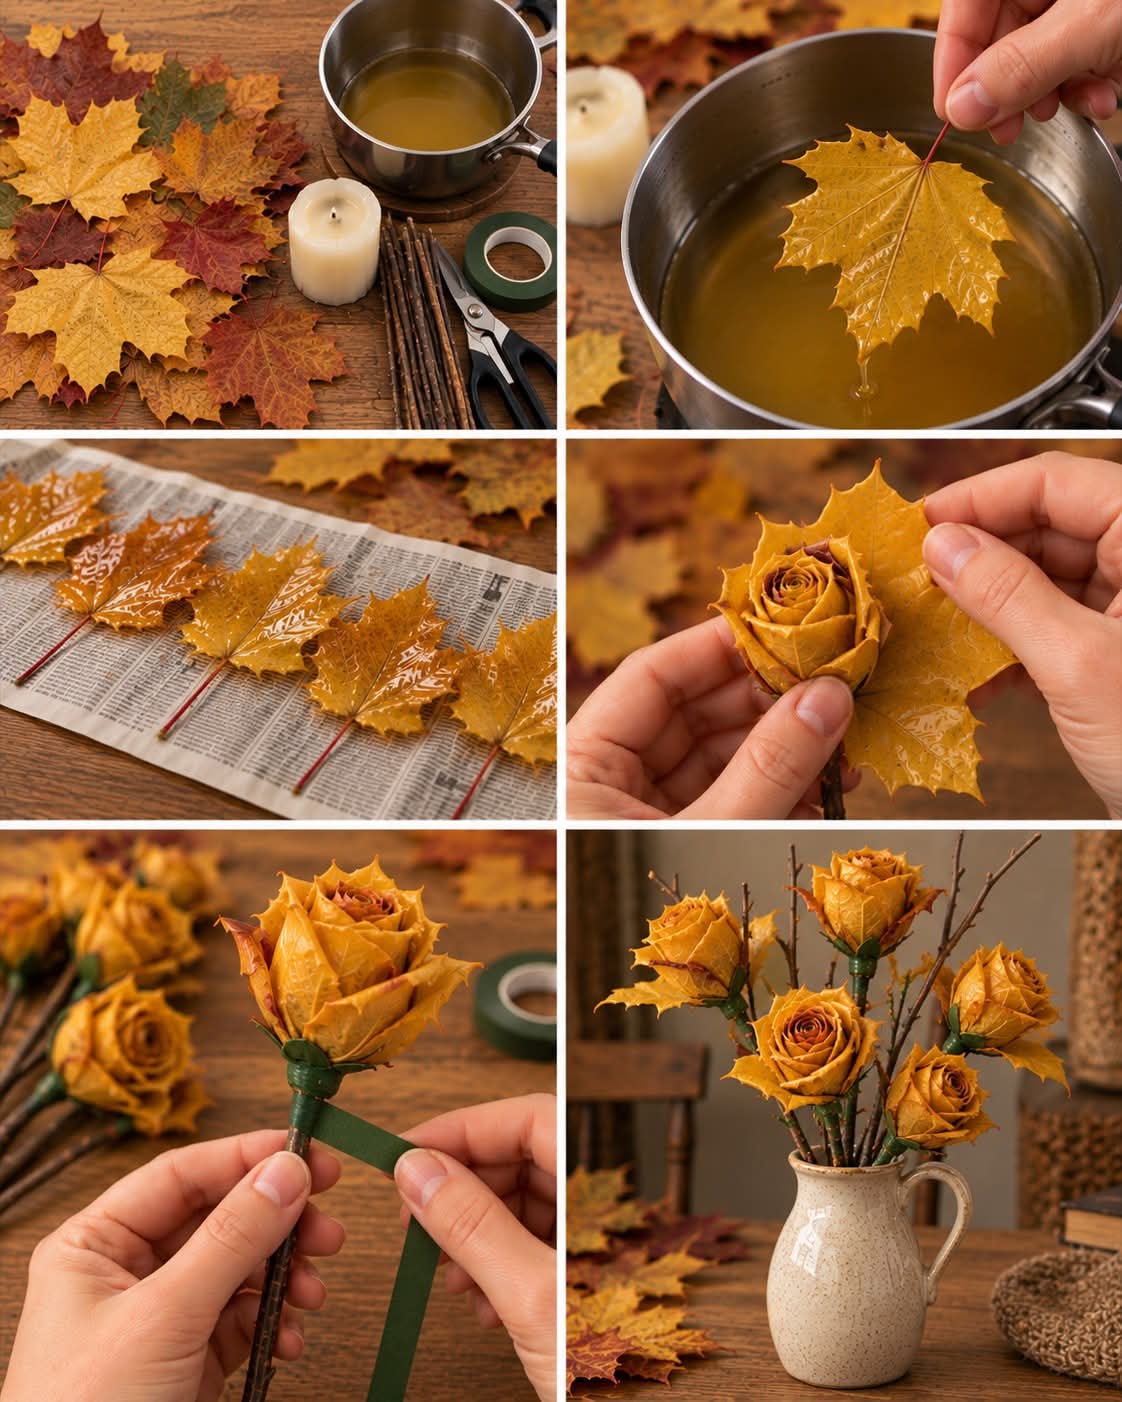
Since they posted without instructions, here you go!
🍂 Fall Leaf Roses
You’ll need: freshly fallen colorful leaves (maple-shaped leaves work especially well), paraffin or beeswax, an old saucepan or heat-safe container for melting the wax, small twigs or floral stems, green floral tape, scissors, and newspaper or parchment paper.
How to make them
- Collect your leaves. Pick leaves that are colorful but still soft and flexible. Avoid crunchy, dried leaves because they’ll crack when you fold them. Gather several sizes for each rose.
- Melt the wax gently. Melt paraffin or beeswax over low, controlled heat—preferably using a double boiler rather than putting wax directly over a burner. Wax is flammable, so don’t leave it unattended.
- Dip the leaves. Hold each leaf by its stem and carefully dip it into the melted wax until coated. Lift it out, allow the excess wax to drip off, and lay it flat on parchment/wax paper to cool. You only need a thin coating.
- Make the center of the rose. Take one of the smaller leaves and fold/roll it into a little rosebud shape. Secure it to the end of a twig with floral tape.
- Add the petals. Wrap additional leaves around the center one at a time. Fold the top portions outward slightly so they resemble rose petals. Start with smaller leaves and gradually use larger ones.
- Secure the rose. Once it’s as full as you’d like, tightly wrap green floral tape around the bottom of the leaves and continue down the twig. This holds everything together and gives you a finished flower stem
